
When the neck of the femur is fractured it needs surgical repair. This fracture happens in cats and dogs.
The fracture is almost always from trauma, although there is a disease called Legg-Calve-Perthes (LCPD) in which spontaneous degeneration of the head of the femur occurs. This is a rare disease.

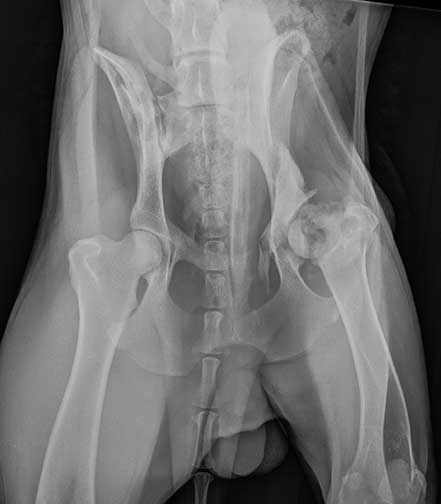
The normal head and neck of the femur are circled in this model. This page will show you how we remove the head when the neck is fractured.
A fractured neck of the femur is the same problem seen in elderly people when they fall and break a hip. Technically, it is not the hip that is fractured, it is the head of the femur.
Several different surgical procedures are used to screw the head of the femur back into the neck where it belongs. They are sophisticated orthopedic procedures performed at surgical referral centers, and some clients cannot afford them.
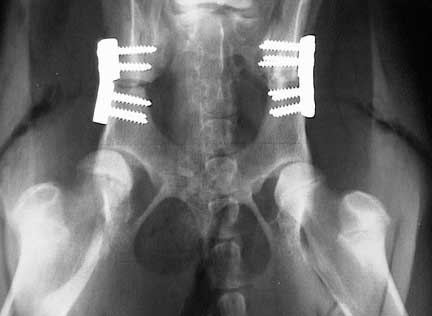
These plates and screws, along with the expertise and facility to put them in, don’t come cheap in this surgery for hip dysplasia.
This is where a Femoral Head Ostectomy (FHO) surgery comes to the rescue. Ostectomy means removal, so the head of the femur, where the ball joint is located, is completely removed. The FHO removes the non-functional head, and allows the body to form a false joint. The cost of this is dramatically less than any other procedure to correct this problem.
We also use this procedure when there is a hip dislocation (called a subluxation) and the hip will not stay in the socket, even when we put it back in and put on a special bandage called an Ehmer sling. We also use this surgery for pets with hip dysplasia that will not be undergoing the more extensive hip replacement surgery called a Total Hip.
This page gives you an interesting behind-the-scenes view of what goes on when we perform an FHO surgery on a dog. It will become obvious that we spend as much time in preparation as we do in the actual surgery.
Diagnosis
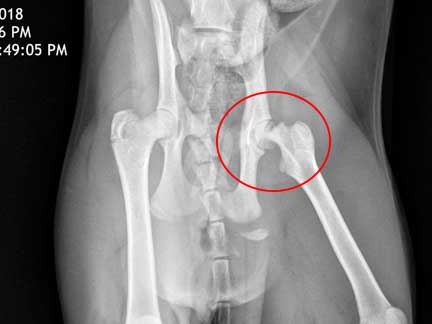
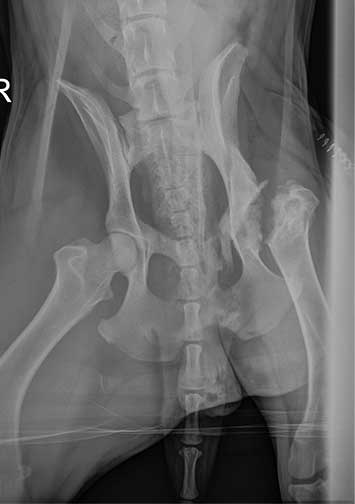
These are the radiographs of a young German Shepherd that was hit by a car. It was brought to us for a limping problem on the left rear leg. A thorough physical and orthopedic exam revealed some swelling at the left knee. This is a VD (ventrodorsal) view of the pelvis.
Do you see the problem?

The wing of the ileum and the acetabulum are fractured. You can also see that the neck of the femur has been fractured. Compare the problem area above in the red circle to the other side to see the fractured ileum.

This purple line gives you a conceptual idea of where the neck of the femur will be cut during the FHO surgery. The exact angle of the cut will be determined during surgery
We also use this procedure in cats very successfully due to their flexibility and light bone structure.
We use the same procedure in cats as we do in the dog, which you will learn about in much more detail in this page
History
This fracture is 3 weeks old, and there is swelling and scar tissue around the fracture that is not apparent on the above radiograph. Also, this is a large breed dog with large muscles and tendons surrounding the fracture.
In a difficult case like this, especially in a young dog that has a long life ahead, we have an orthopedic specialist come to our hospital to perform the surgery. He has special equipment, and over 45 years of experience, to make this a successful surgery, with the end result a pain-free and active dog that is not limping for the rest of its left.
Before any surgery is performed, our surgeon Dr. Paul Cechner, consults with the owner to go over all of the options. This includes post operative care, which is an important aspect to make sure adequate healing occurs. This dog needs to be confined for several weeks after surgery for it to heal properly.
Once the consultation with our surgeon was performed we put this dog on a pain and anti-inflammatory NSAID called Rimadyl until the day of surgery. Our patient was brought into the hospital the night before surgery and intravenous fluids were started and a pain patch was applied.
Pre-surgical Preparation
Blood Panel
A dog that has been hit by a car hard enough to break a leg might have some internal injuries that are not apparent externally when we perform a physical exam. One test to help us look for any problems is a blood panel.
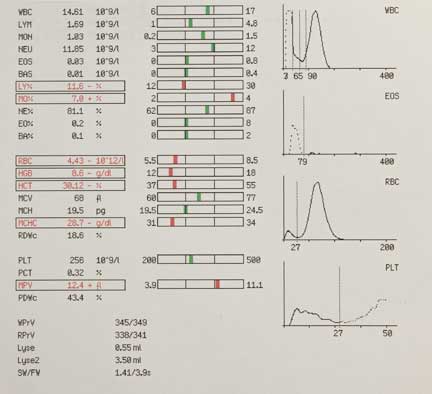
This is one page or our multiple page in-house blood panel. This pet is anemic, so we will be on the alert for internal bleeding
If the anemia is severe enough we will give a blood transfusion prior to surgery
Radiology
This is especially important on a trauma case like this. Our patients do not talk to us, and they have high pain thresholds compared to us humanoids, so they don’t always show symptoms to let us know something else is a problem besides the fracture. We do not want any surprises on the day of surgery.
When we take a pre-anesthetic radiograph we are specifically looking for fractured ribs, pneumothorax, and a diaphragmatic hernia. This is important to minimize the risk of anesthesia, and to make sure all problems are identified and corrected.

This is a normal chest radiograph on a dog
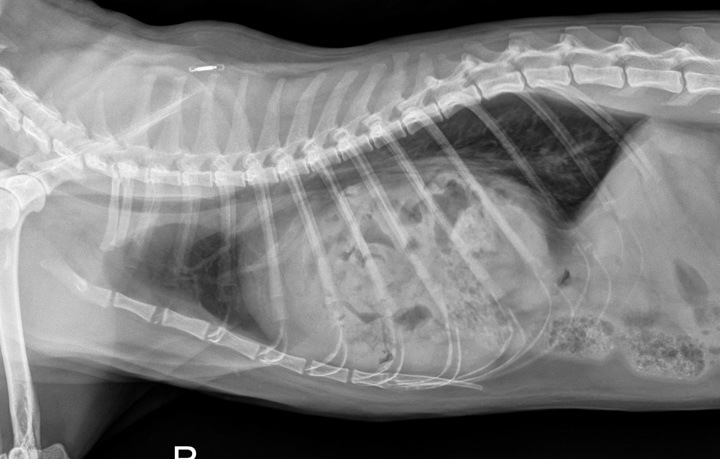
This is what a diaphragmatic hernia looks like. Can you see it compared to the radiograph above?
Our Radiology page has detailed information on how to read a radiograph if you are interested.
Pre-Anesthetic ECG
Animals like this dog that are HBC can have trauma to the heart that is not apparent when we listen with the stethoscope. For this reason we perform an electrocardiogram just prior to surgery.
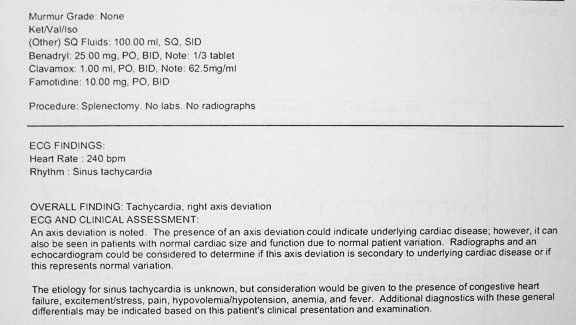
This one has a potential problem that needs to be addressed
Cardiac Ultrasound (Echocardiogram)
If we do hear a problem with the stethoscope, or if the radiograph or ECG shows a potential heart problem, then we will do an ultrasound to know for sure.
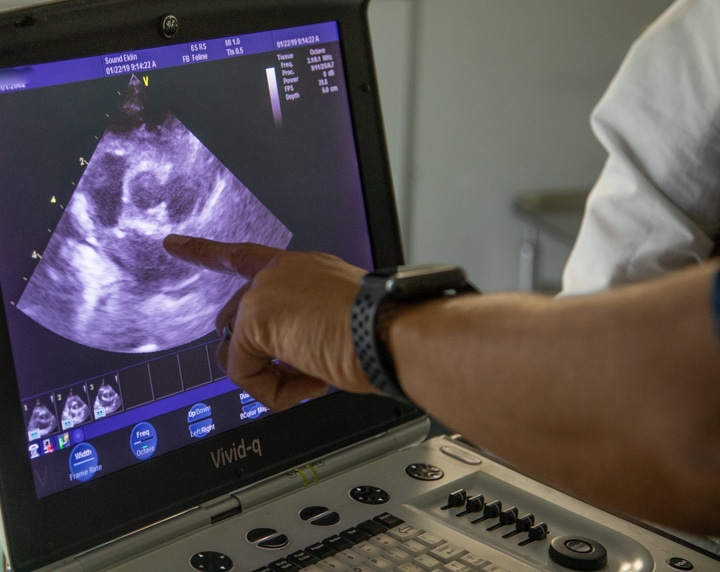
This is our cardiologist Dr. Fred Brewer teaching one of our externs about a problem heart valve on an echocardiogram
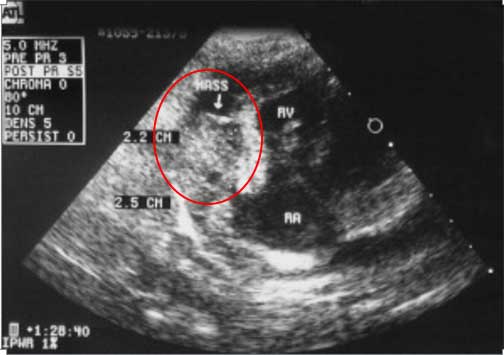
This rare problem, a tumor of the heart (in the red circle labeled mass), can only be detected by an echocardiogram
FHO Surgery
Even though our patient has been examined before, on the day of surgery we perform another physical exam. When a patient has been hit by a car (will abbreviate it as an HBC) problems that are not apparent initially might appear later.
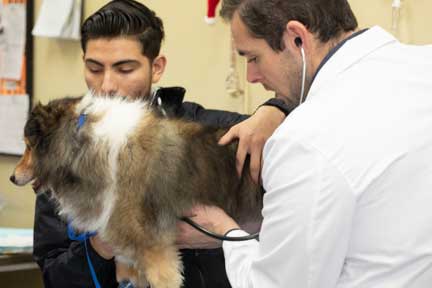
During this pre-anesthetic exam particular attention is paid to important organs regarding anesthesia like the heart
Anesthesia
Once we have analyzed our pre-anesthetic exam and tests we will proceed to anesthetize our patient. They are given pre-anesthetic tranquilizers and pain medication to calm them down. Our Anesthesia Page has much more information on this.
Injectable Anesthesia
Injectable anesthetics are used for many purposes. One of their primary uses is to sedate pets before giving the actual anesthesia (called pre-anesthetic). In sedating ahead of time we dramatically minimize anxiety, cause a smoother recovery, and minimize how much anesthetic we need to administer during the actual procedure. In addition, some injectable anesthetics minimize vomiting, a common problem when waking up from anesthesia.

Injectable anesthesia is given intravenously, and rapidly induces relaxation so that we can put in a breathing tube (also called an endotracheal tube or ET tube)
Endotracheal Tube
Oxygen is delivered to the lungs by the ET tube in its windpipe. It is the preferred method to administer oxygen because it is very efficient, will prevent any vomitus from entering the trachea (vomiting rarely happens because of fasting and pre-anesthetic sedation), and allows us to gently inflate the lungs during surgery so that they work at maximum efficiency.
Besides oxygen, the anesthetic gas (Isoflurane) is also administered through the endotracheal tube. Medications can even be administered via this special tube.

The endotracheal (ET) tube is placed directly into the windpipe
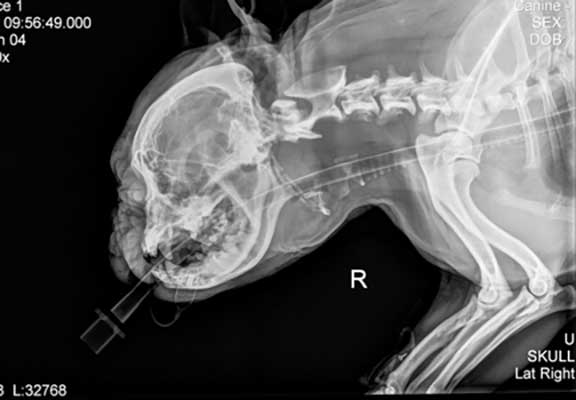
This x-ray shows the breathing tube as it passes over the tongue and down the trachea (windpipe)
We can easily breathe for your pet and inflate your pet’s lungs by gently squeezing the bag connected to the tube, monitoring the amount of pressure we are exerting with a gauge on the anesthetic machine. Each size and species of pet requires a different sized endotracheal tube.
The tube is not removed from your pet until it is literally waking up. This ensures that the swallowing reflex is present, and your pet is now safely able to breathe on its own.
Gas Anesthesia
The mainstay for general anesthesia is gas anesthesia because it is very safe and highly controllable. We use a safe and effective gas anesthesia called Isoflurane. It is so safe it can be used in creatures as small as tiny birds. As soon as this patient is intubated it is put on gas anesthesia.
An instrument called a precision vaporizer is used to deliver the Isoflurane anesthetic gas within the oxygen. It is a very precise instrument allowing us to make fine adjustments in anesthetic level. Without this vaporizer we would not have the wide safety margin that we currently enjoy.

We can precisely and easily change the level of anesthesia during the procedure as needs change
For most surgeries we administer the anesthetic at a setting of 1-3 %. This small percent of anesthetic, added to the 100% oxygen the pet is breathing, is all that is needed to achieve complete surgical anesthesia. Before the surgical procedure is finished the anesthetic is lowered before it is turned off completely. As the surgeon is finishing the procedure your pet is in the beginning stages of waking up. This decreases anesthetic time, another way we minimize anesthetic risk.
Oxygen
All pets put under gas anesthesia are given 100% oxygen from the moment they are anesthetized until they wake up, dramatically increasing the safety of the procedure.

We have a special machine in surgery that generates 100% oxygen
As a backup, oxygen is stored in large tanks under high pressure. The oxygen in these tanks is delivered to the anesthetic machine via special piping throughout the hospital. This allows us to have anesthetic machines in several hospital locations.
Our patient is anesthetized and the leg is shaved outside of our surgery room. We do all of this outside of the surgery room to keep it as clean and sterile as possible.
Monitoring Anesthesia
Our surgeon is one of the best monitors, because he/she is literally visualizing the blood in the circulatory system. Any change in the blood is readily noticed because pets that are breathing 100% oxygen should have bright red blood.
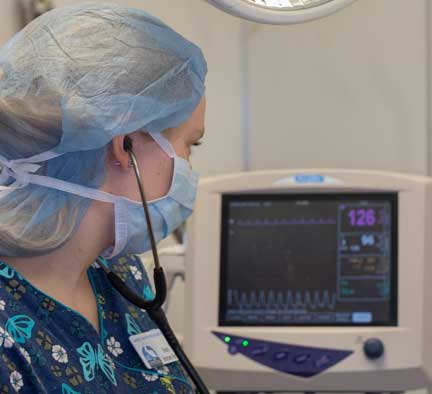
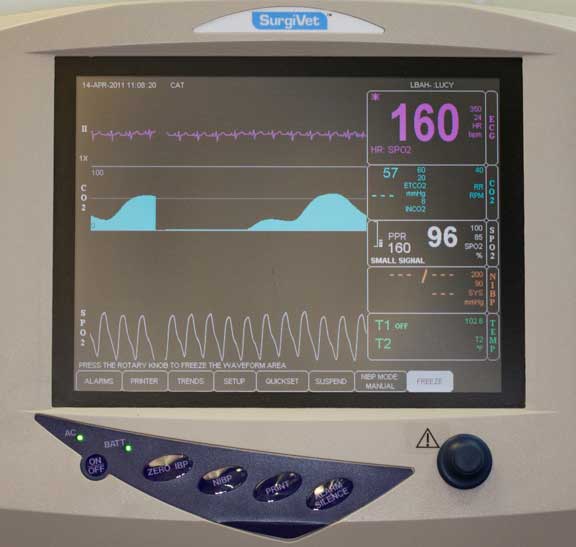
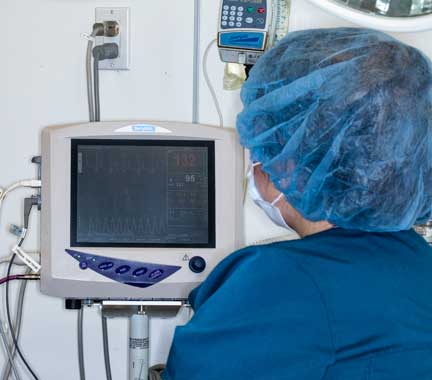
We use a sophisticated monitor to keep track of important physiologic parameters during surgery
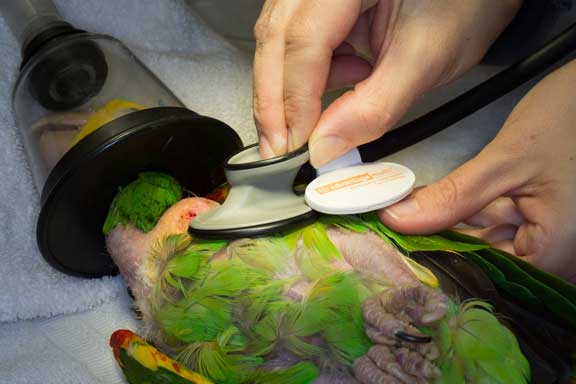
Even with all of that high tech monitoring equipment we still stay hands-on during the whole procedure, even on patients as small and unique as a bird

We keep detailed records of fluid rate rates, anesthetic and oxygen levels, and physiologic parameters, during the surgery
Surgeon Prep
While our patient is being anesthetized and the hair on the leg clipped and given an initial scrub our surgeon is supervising and preparing himself for the surgery.

While our patient’s leg is shaved our surgeon starts the scrubbing process with a surgical hand scrub to make sure this is an aseptic procedure

He starts with a thorough scrubbing of his nails and hands
And doesn’t stop scrubbing until he reaches his elbows
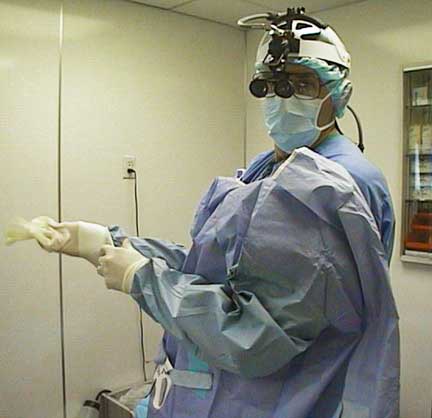
Dr. Cechner gowning and gloving, with his magnifying loop on his head
Patient Prep
When intubated and the initial scrub is completed our patient is brought into surgery and hooked up to our anesthetic monitor. As you view the following pictures you will realize that preparation is a key part of this surgery.
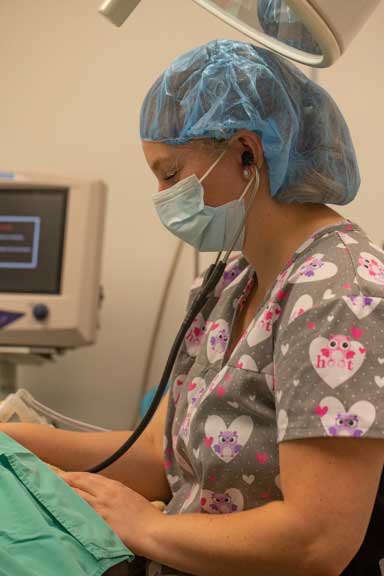
Our nurse anesthetist is monitoring the IV fluids and anesthetic monitor. These fluids are critical to minimize anesthetic risk.
When our patient is stable and under the proper plane of anesthesia in the surgery suite our surgical assistant goes through the multi-step final prep process to scrub the leg. This is a crucial step to minimize the risk of infection after the surgery, so we are thorough and methodical in our approach to this part of the procedure.
This final prep is so important that our surgeon directly supervises all of it, and does the last part of it himself.

Our patient arriving on the surgery table that is kept warm with special towels and heating blankets
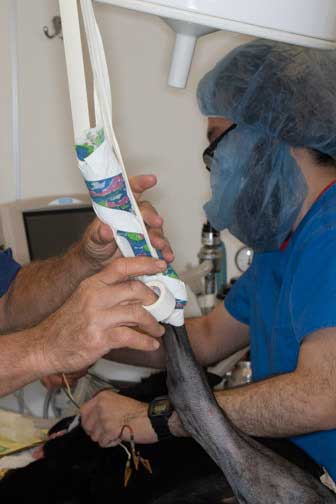
The first step is to tape the leg up in this position
The first scrub of the leg occurs with the leg in this position
He continues scrubbing the leg after our surgeon does an initial draping

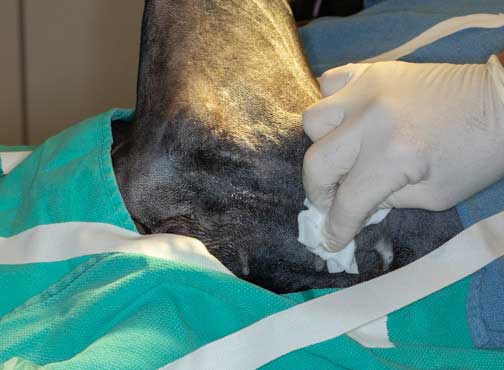
Once our surgeon is satisfied with the initial surgical scrub he does his own final scrub with a special antiseptic
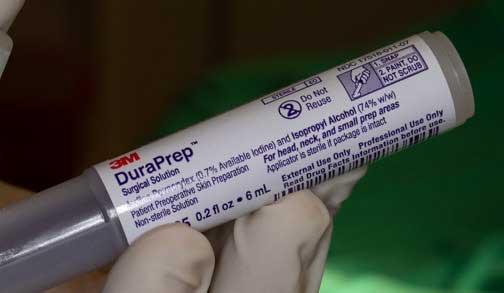
It is called DuraPrep

It is applied directly over the area of the incision

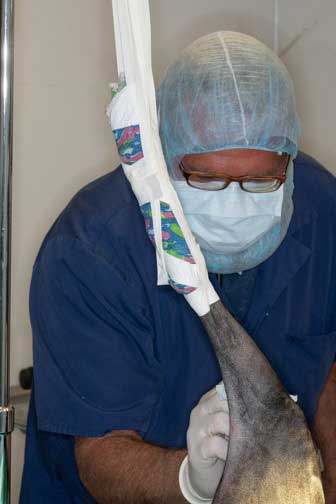
After the DuraPrep our surgeon drapes the leg with it still hanging. In the background is our anesthetist monitoring anesthesia

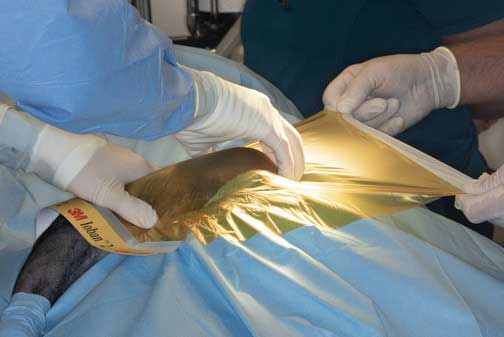
The foot is wrapped in sterile aluminum foil and the tape is cut to bring the leg down

This is the position of the leg during the surgery

The foil is wrapped with a special sterile tape

The appearance of the foot before the final draping

Another drape without a hole is put over the surgical field

Our surgeon makes a custom opening in the drape specific for this surgery

He checks the exact location of where his incision will be before proceeding any further

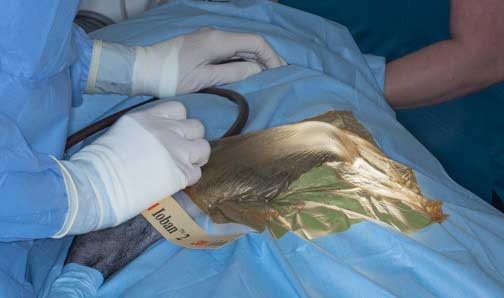
The next step in the preparation involves and aseptic barrier called Ioban
It is adhered right to the skin where the incision will be
The surgical preparation is now complete and our surgeon is ready to make the skin incision to start the surgery

His sterile bone cutting tool is now opened up
Surgery
As you have just learned, preparation is important. Only once our surgeon is comfortable with the preparation of the surgical site, and our pet is stable and under the proper plane of anesthesia, does the FHO procedure begin.

He palpates the landmark for the skin incision

Let the surgery begin!

Once through the skin the next layer encountered is the subcutaneous (under the skin) layer, sometimes abbreviated as SQ
The surgical approach goes between several important muscles and tendons in order to gain access to the joint where the fracture is located. These include the biceps femoris muscle, the tensor fascia latae muscle, the superficial gluteal muscle, the deep gluteal muscle, and the vastus lateralis muscle.
The muscles and tendons are not cut in order to gain this access to the joint. Careful dissection is performed in this area to preserve the normal anatomy, and not interfere with important nerves and blood vessels This is one of the most difficult parts of the procedure, and where the experience of our surgeon comes into play.

Dr. Cechner is carefully dissecting through all these layers of muscles and tendons

After much careful dissection Dr. Cechner has the head of the femur exposed in the center of this photo. It is difficult to see because it is covered in scar tissue. On the left is the special oscillating saw that will cut through the neck of the femur. The opening is small, so our surgical assistant on the right is using a retractor for better visualization.
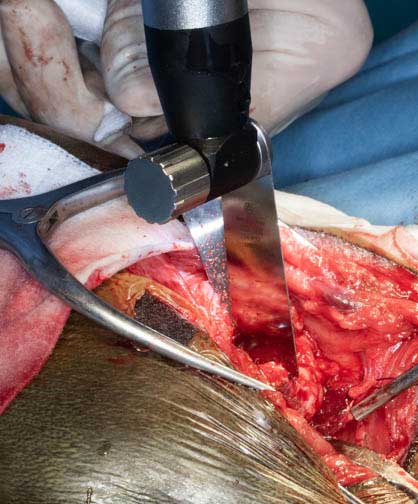
The oscillating saw gives a quick and precise cut with minimal bone trauma

The appearance of the head of the femur just before the cut is complete

A special rongeur is used to smooth off the bone incision

Now the long process of suturing everything back together begins
The postoperative radiograph
Our patient stayed overnight with pain injections administered that were in addition to the pain patch. He went home the next day with antibiotics and oral pain medications The skin sutures were removed in 14 days. After several weeks of confinement, and several weeks of moderate use, he is doing great! Our thanks to Dr. Paul Cechner for doing such a great job.
A fracture like this is painful, and an animal can go into life-threatening shock due to this pain. The Long Beach Animal Hospital, staffed with emergency vets, is available until the evenings 7 days per week to help if your pet is having any problems, especially shock, fractures, seizures, pain, difficulty breathing, or bleeding.
Think of us as your Long Beach Animal Emergency Center to help when you need us for everything from minor problems to major a major emergency. We serve all of Los Angeles and Orange county with our Animal Emergency Center Long Beach, and are easily accessible to most everyone in southern California via Pacific Coast Hwy or the 405 freeway.
If you have an emergency that can be taken care of by us at the Animal Emergency Hospital Long Beach always call us first (562-434-9966) before coming. This way our veterinarians can advise you on what to do at home and so that our staff and doctor can prepare for your arrival. To learn more please read our Emergency Services page.
If you would like to learn much more about how we do surgery at the Long Beach Animal Hospital, including pre-anesthetic testing, anesthesia, and surgical concepts, please visit our Surgical Services web page.