

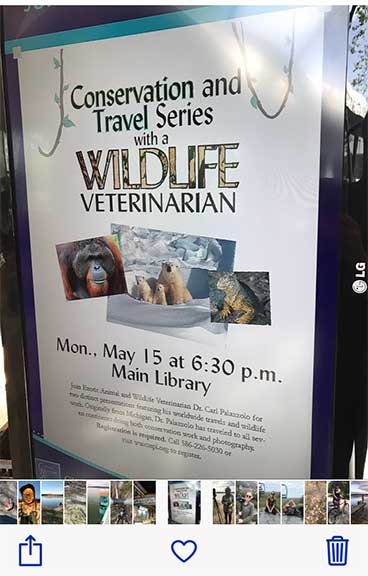
Enjoying some brown bear viewing in Katmai National Park
On this trip you can get up close and personal with this coastal brown bear in Katmai National Park
Speaking of bears, in April of 2022 we were in Svalbard, Norway with Roie Galitz and some awesome guides that got us 30 yards away from this collared female polar bear while we were on snowmobiles.Dr. P took this video in Canada of a polar bear walking 20 feet in front of him
My veterinary degree has opened up doors on these trips that is not available to the average nature and wildlife photographer. Because of this, I have unique action photos and a profound understanding of the nature world. I would like to share this with you on this page. If you read my stories, and not just look at my photos, you will get more out of it.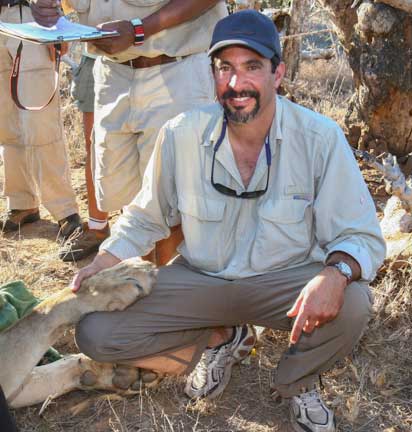
When the veterinarian for the Kenya Wildlife Service found out I was a colleague I was invited to sedate a lion with him. You can learn more at the Lions of Tsavo trip later in this page.
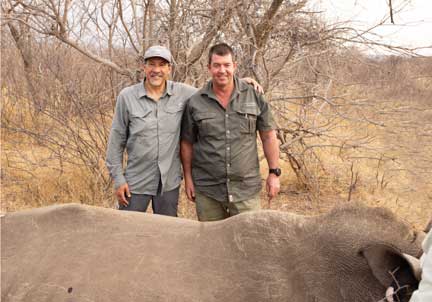
Dr. P standing over a sedated rhinoceros with Andre Uys, a South African veterinarian with the skills to sedate a large and risky animal like this safely. Click on the picture above to learn much more.
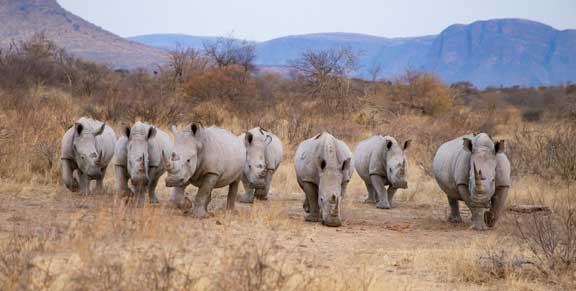
Thanks to Andre and the Marataba Conservation area, we saw many rhino every day
If you ever join us on a trip you will learn advanced wildlife photography and get to use my professional Canon cameras and telephoto lenses on occasion. We have a ball, take tons of photos, eat like royalty, and learn about a different culture. These trips are life-changing experiences for most people.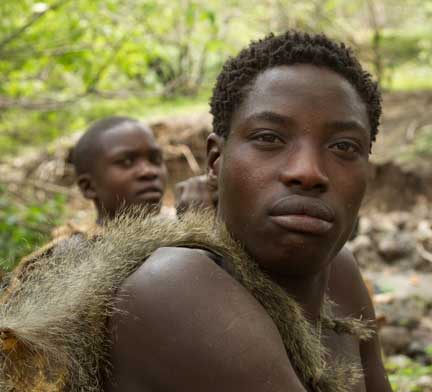
Talk about a different culture! This man is my new best friend because he took me hunting with him for the day. He is a Hadza, also know as an Hadzabe, and I learned all about his culture that goes back 10,000 years. It was fascinating to be with these people for two days. The Rwanda/Serengeti trip link later in the page has more details.
Watch how the chief shoots an arrow at a monkey in a tree and listen to how they talk in their click language
I make a web page for the people that go on my trips so they can show off their photos to their friends. It’s not just a bunch of disparate pictures, it’s a travelog that explains each trip in detail (with a good dose of humor and laughing at ourselves sometimes).
This is my version of photojournalism, and how I share my photography with others. It’s a good way to educate people on what is going on in the world, particularly from the conservation point of view.

For the people that go on my trips I put on a slide show showing off their trip to their friends on my large screen TV. This makes the pictures come to life, and when embellished just right, their friends who did not go on the trip wish they had.
This page has photos on just some of the trips I have taken over the last 35 year. There will be detailed descriptions of these trips and the people and wildlife that live there, so click on the many links to get the full story. There is lots here, so take your time and enjoy.
Here is a list of some of the places you will be visiting in detail later in this page:
- Falkland Islands
- Namibia
- Botswana
- Nomads of the Summer and the Golden Eagle Chicks
- Mongolia and the Golden Eagles
- Africa’s Lake Ndutu and the Selous
- Photographer’s Africa
- Orangutans of Borneo (2nd time)
- Arctic trip for polar bears
- Rwanda for gorillas
- Serengeti National Park for the big cats
- Hadzabe people of Tanzania
- Galapagos
- Tanzania
- Antarctica
- Wildebeest migration in Africa
- Kodiak bears of Katmai National Park
- Maneless lions of Tsavo National Park
- Orangutans of Borneo
- Black Rhino of Zimbabwe
Animals on the Decline in Africa
If you are a wildlife photographer you need to think about getting to the continent of Africa soon. The abundance of wildlife, and the predator-prey relationship, is the best on the planet. You cannot wait and expect it to stay this way much longer.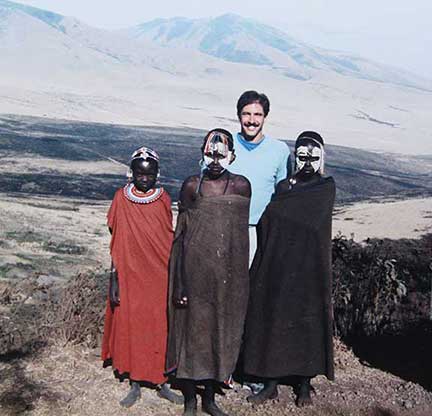
My first trip to Africa was in 1986. This picture was taken in Tanzania with some local Masai girls.
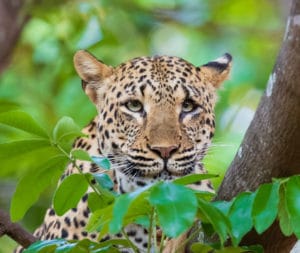
This male leopard photo was taken in South Luangwa National Park in Zambia in October of 2020. They are still there if you go soon.
African wildlife are in serious decline due to the burgeoning human population of a billion people and rising. The other reason is the rampant poaching fueled by the demand in China and other Asian countries for animal parts, especially rhino horns and elephant tusks. In Addition, with COVID-19 hurting tourism, there is an increase in poaching for bush meat.A solar powered tracking device used in South Africa for continual monitoring of this rhino’s whereabouts to prevent poaching
My primary interest in African photography is photographing the big cats hunting their prey. It is an intense experience to watch them when they are fixated on their prey- nothing will dissuade them from attacking it. These photos are hard to come by, and it took me five trips to see my first one. Below are a few teasers. When you follow the trip links later in this page to see the full hunt you will see how they catch their prey.
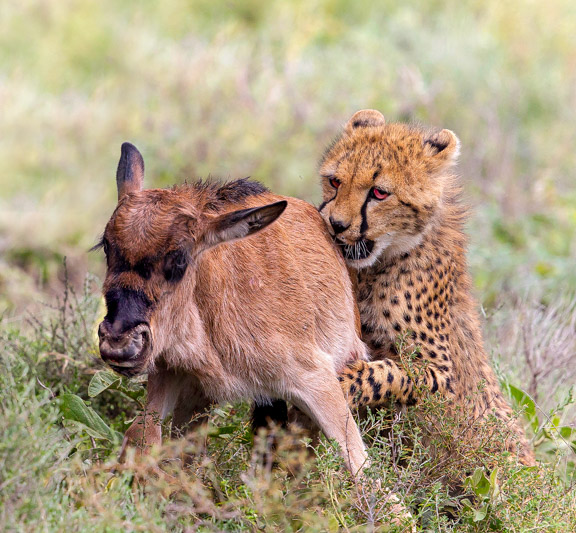
These yearling cheetah are learning how to capture a two-day-old Thomson’s Gazelle calf in the Masai Mara

This female leopard in Botswana is deftly running across a log as it pursues its prey

This lioness in the Serengeti is ready to jump on a zebra
This yearling male cheetah is taking down a three-day-old wildebeest calf on his own in the Serengeti
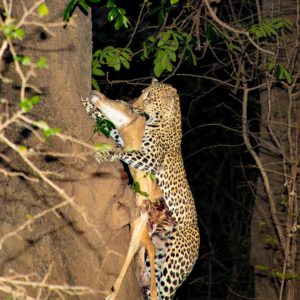
This night-time leopard in Zambia climbed up this tree in 3 seconds when a hyena threatened to take its prey
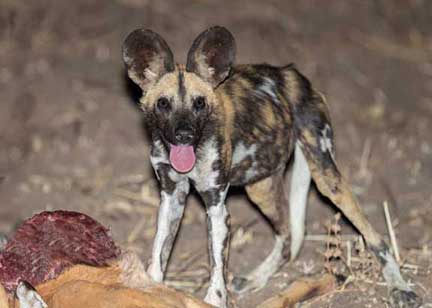
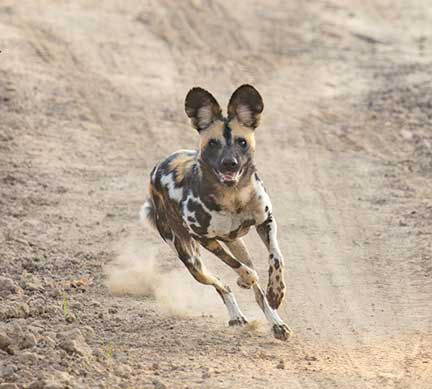
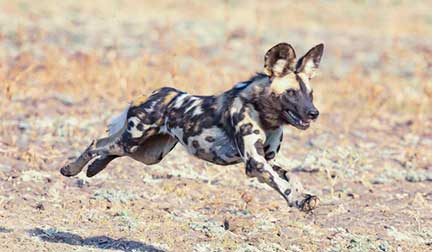
In addition to leopards, Zambia is know for wild dogs like this one that just killed an impala
To learn more about the plight of the big cats, and what is being done about it, I went to Namibia in 2017 to learn about cheetah at the Cheetah Conservation Fund. More info is on the Namibia link below.Rhinoceros Conservation

Dr. P in 1995, with a Zimbabwen park ranger named Zhou, after finding three black rhino in one day. If you click on the 1995 rhino trip below you will learn much more about this.
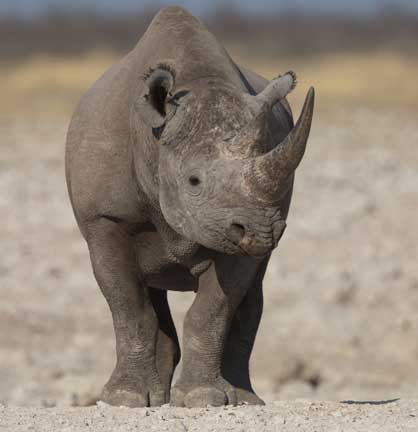
Dr. P took this photo of a black rhino in Etosha National Park in 2017. Follow the Namibia link below to learn more

Rhinoceros mother and calf drinking at a waterhole in South Africa on our 2021 trip
A day in the life of a safari vehicle- 2 minute fun video
In the video we start off at 6 AM as the sun is rising. Once the sun rises, our guide, speaking in Swahili, calls other guides to see where the action is. For those of you not versed in Swahili, our guide is asking if they have seen any lions this morning. They reported nothing so far, so he is telling them in a humorous manner that I need to find something interesting to show the guests, so keep me posted. Eventually our vehicle spins out on the grasses of the Serengeti, one of the occupants shows how breezy and bouncy it is when driving home as the day winds down, we watch a video of the Serengeti while in the Serengeti, help another vehicle stuck in the mud, drive through a flooded road, and make it home before the sun sets. A typical day in the life of safari vehicle.Veterinary Conservation Trips
Costa Rica
Dr. P travels the world to help with animal related conservation. In March of 2020 (during the Covid-19 outbreak) he went to Costa Rica to work with Dr. Marie Rush doing veterinary and conservation work at Wild Sun Rescue with Jeremy Levine.The scarlet macaw at this feeding platform is from a breeding group at Wild Sun that is being released to repopulate the area
Dr. P and Dr. Rush are also worked with howler monkey babies. Their mothers were electrocuted by walking on wire that was not insulated (98% of Costa Rica) and the babies survived. They are being cared for to hopefully release them back into the wild.
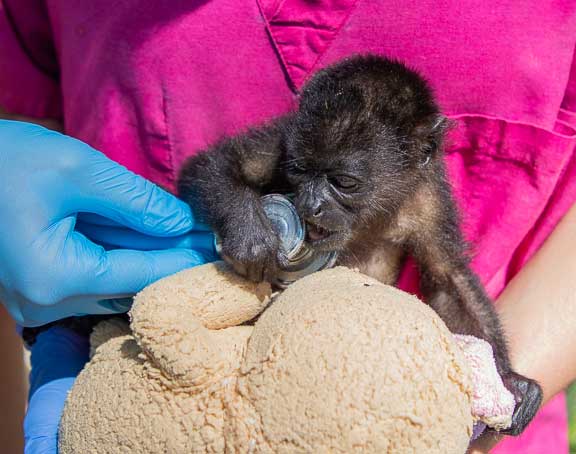
You need to move fast when you examine one of them or else you might end up with teeth marks on your stethoscope

It is the volunteers at Wild Sun Rescue that do much of the work rehabilitating these babies for release back into the wild
When the veterinary work was finished Dr. P taught Dr. Rush some wildlife photography with professional equipment. It is a big step up for many people, and there is a significant learning curve.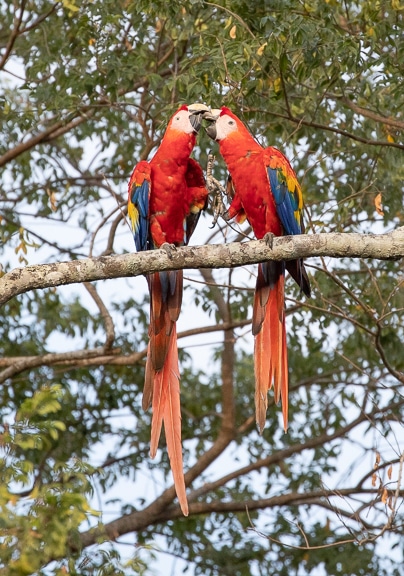
Professional photographic equipment and knowing how to use it can make a difference
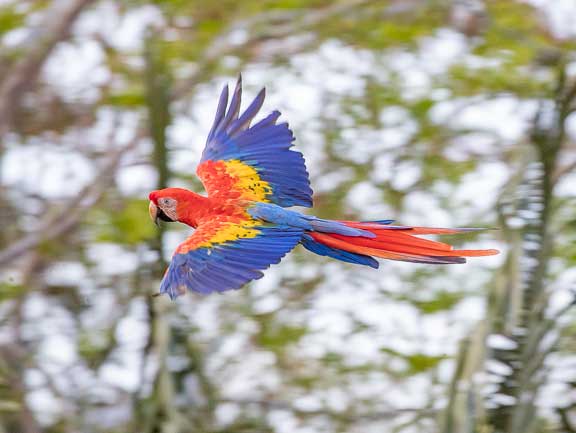
Even with professional camera equipment it takes practice to catch one flying past
Bald Eagles
Dr. P is in the process of writing a book on the comeback of the bald eagle. It should be completed by the end of the summer of 2026. In addition to hundreds of outstanding photos the book will explain how he diagnoses and treats lead toxicity and broken wings. There will also be a section on how they are banded as chicks and how to photograph them. Check back here in the summer of 2026 for a link to the book.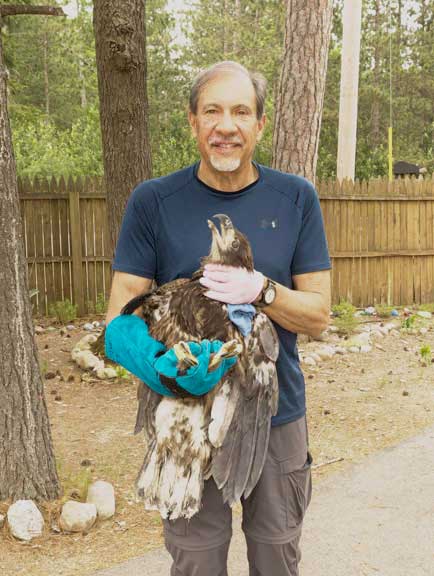
Dr. P examining a chick with lead toxicity
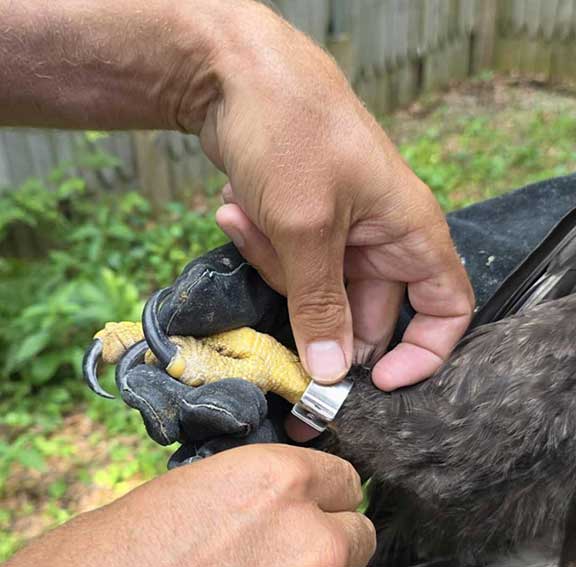
Banding a bald eagle chick
Piping Plovers
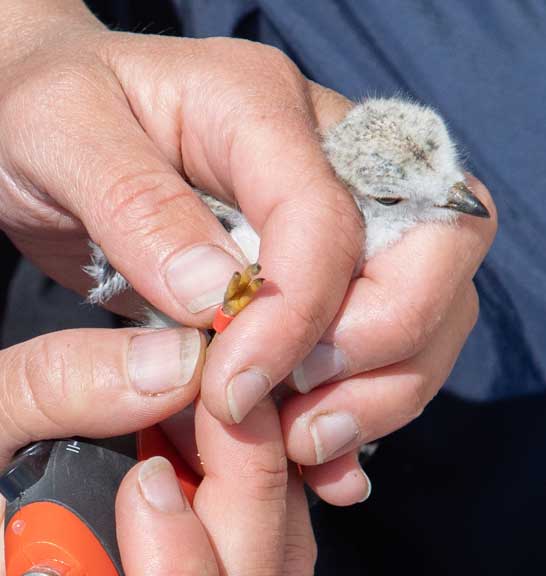
Putting a tag on a Piping Plover. Click here to learn how Dr. P worked with local biologists to capture and tag them.
Latest Trips
In August of 2021 we went to South Africa trip where we sedated several rhinoceros. Click on the rhino picture below to see the full story of how and why we sedated this white rhinoceros.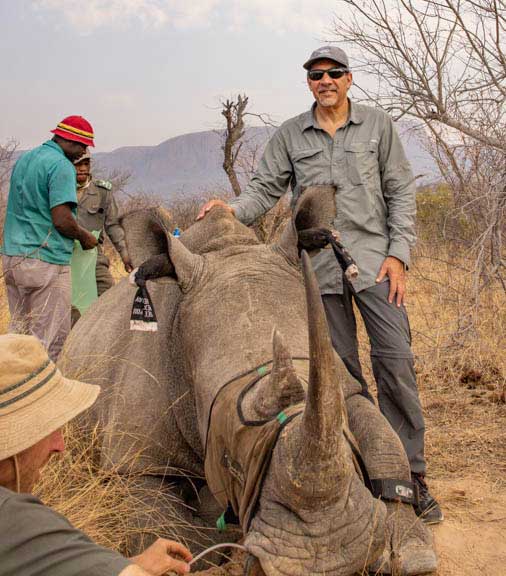
A white rhino under sedation with M-99 (etorphine) that is being prepared for an ultrasound to see if she is pregnant
In August of 2023 we went back to South Africa to work with the veterinarians that sedate rhinos (see picture above), along with a safari to Zambia to see the leopards and wild dogs. Those pictures and stories will be posted later. We are going back in August of 2025 if you are interested in gorillas, leopards, wild dogs, the Serengeti, Botswana at the Okavango Delta, and rhino. Detailed links to those past trips are below in this page.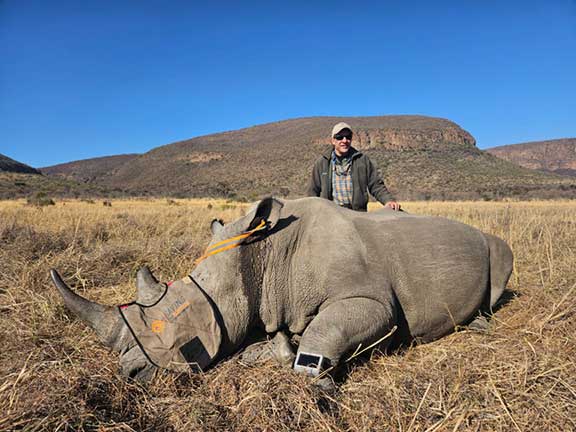
One of the many new friends we made on our 2023 trip
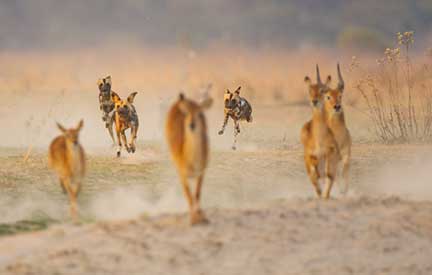
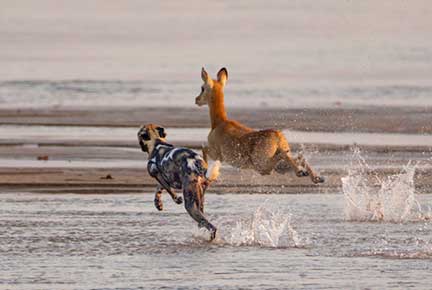
Here are a few low res photos from the Zambia part of 2023 trip where we spent time with the wild dogs (also called painted dogs) and their puku prey. It was such an amazing experience we have ordered them up again for our September 2025 trip! Click here to see many more photos of this trip on Dr. P’s new wildlife photography page, then come back here t complete your tour of this extensive photography page.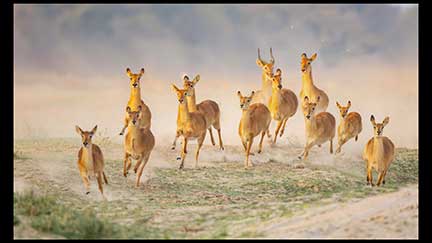

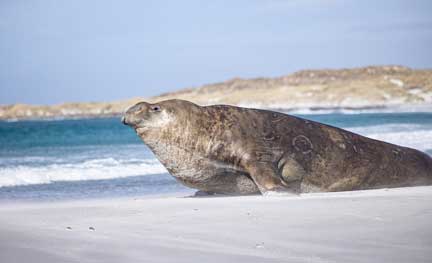
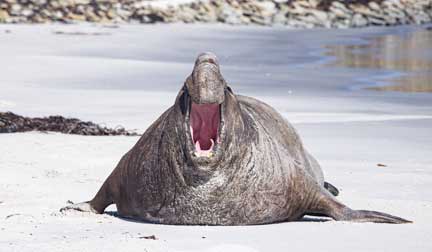
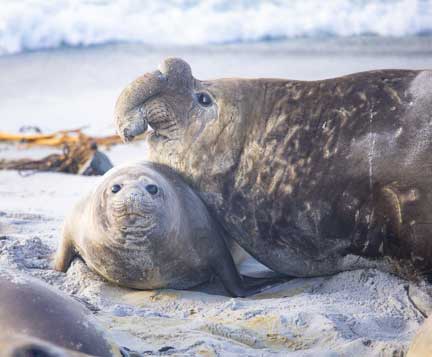
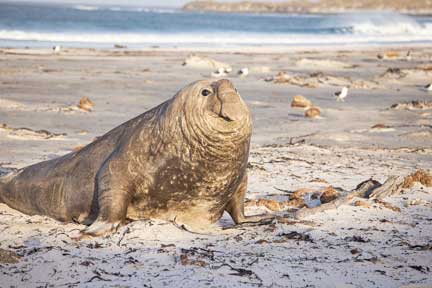
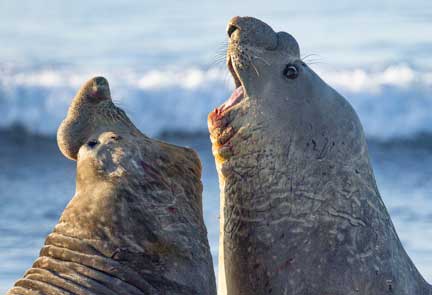
 In October of 2023 we went back to the Falkland Islands to photograph the ginormous elephant seals and the killer whales, along with those way-too-cute penguins! Complete web page on this to come later. Lots of penguins, fighting and mating elephant seals, pups being born, and Orcas (killer whales) on this trip. Here are a few low res photos of the ginormous elephant seals that weigh up to 8,000 pounds.

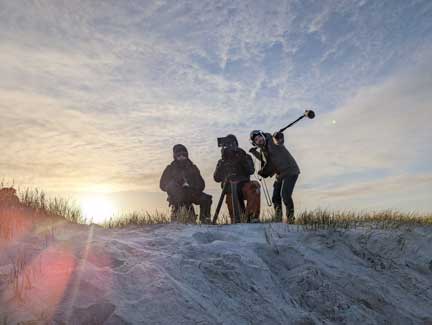
 Click on the Falklands 2018 trip link just below to learn all about going to this fascinating place. We are going back again in November of 2025 with the same film crew Dr. P took in 2023 to finish the documentary they are making. Here is the film crew in action!
Recent Trips
July of 2024- Norway and the Arctic at Svalbard for polar bears, walrus, and whales. You can learn more about what a trip like this is like from my 2012 Svalbard polar bears link below. October of 2024 Dr. P a special polar bear trip in Canada walking a path where the polar bears migrate. This is not to be confused with the typical tundra buggy trip most people go on. November of 2024 to photograph jaguars in the pantanal.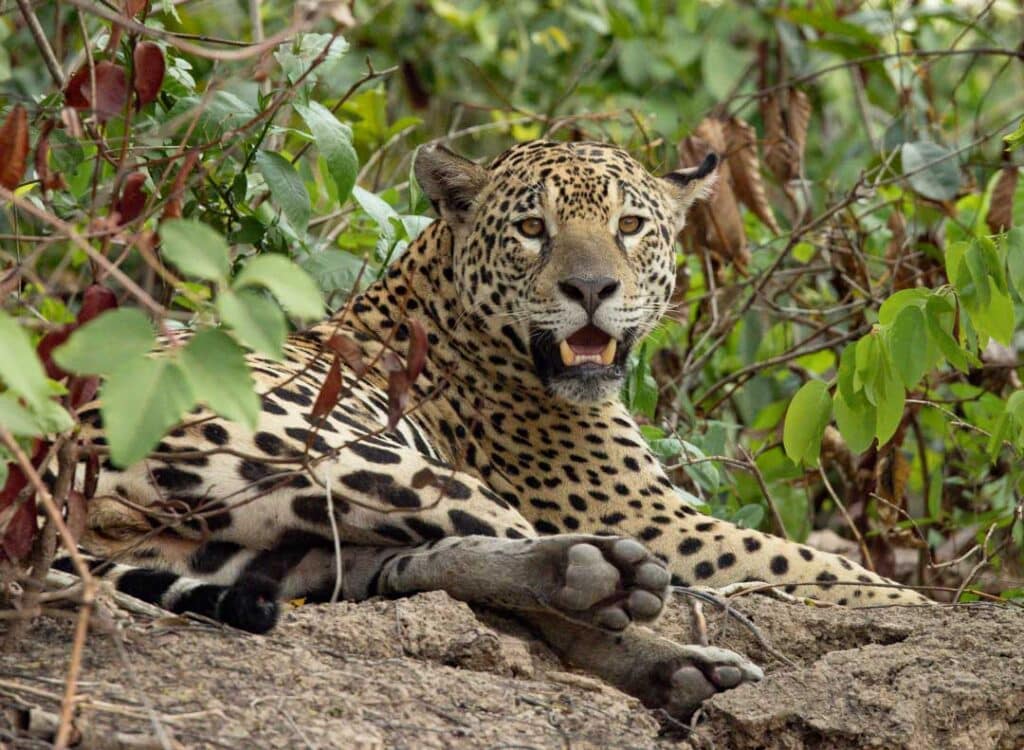
 September of 2025- Back to Africa for the rhino sedation trip, Zambia for leopard and wild dogs, Serengeti for cheetah and lions, and the gorillas of Rwanda. Contact Dr. P now if you are interested in joining us for this trip. Carlp@me.com
In the future Dr. P has repeat trips planned for Borneo with the orangutans, Mongolia with the golden eagles, and Africa for the big cats, in addition to tigers and snow leopards in India.
September of 2025- Back to Africa for the rhino sedation trip, Zambia for leopard and wild dogs, Serengeti for cheetah and lions, and the gorillas of Rwanda. Contact Dr. P now if you are interested in joining us for this trip. Carlp@me.com
In the future Dr. P has repeat trips planned for Borneo with the orangutans, Mongolia with the golden eagles, and Africa for the big cats, in addition to tigers and snow leopards in India.
Follow the links below for detailed stories and pictures of the trips Dr. P has already been on. There is lots here, so pace yourself!
The Falkland Islands- A Penguin and Marine Mammal Spectacle

Nothing is more entertaining than a penguin going about its business, like this Gentoo evading a sea lion. Click on the picture above to learn more.
Namibia- Where Desert and Ocean Meet
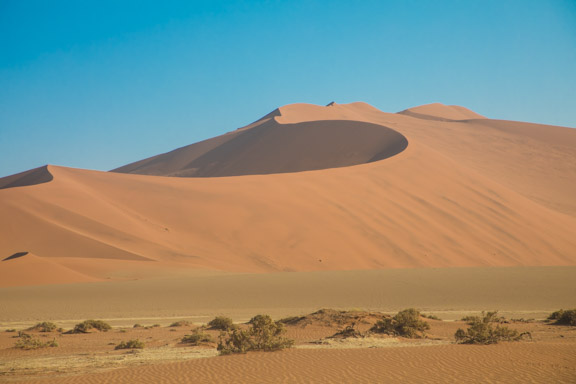
Click on the picture above to see us travel the country, from the dunes to the skeleton coast to Etosha National Park (don’t miss the rhinoceros photos) to the Cheetah Center
Botswana and the Okavango Delta
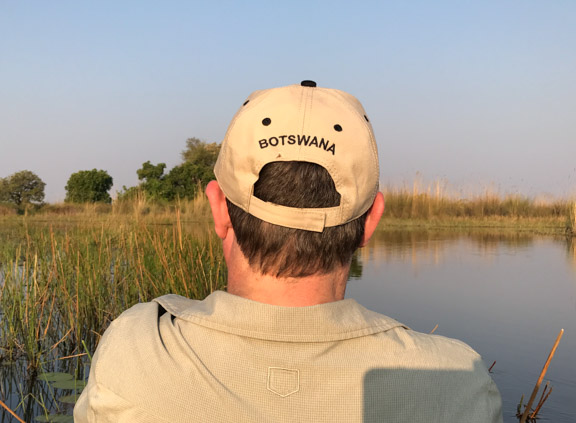
Join us as we see lions, leopards, black mambas, elephants (and much more), and swim to the edge of Victoria Falls
Nomads of the Summer and the Golden Eagle Chicks

After our winter trip, which you can learn about below, we went back in the summer to continue the filming of our documentary movie called “The Twelfth Eagle”
Mongolia-Land of the Golden Eagles

We are making a documentary video on the Kazakhs and their golden eagles, a relationship that goes back 5,000 years
Africa’s Lake Ndutu and the Selous

Our 8th and best trip yet, with lots of great wildlife sightings in the Serengeti
Photographer’s Africa

My 7th time in Africa, busting those cheetah in action as they are hunting gazelle
Back to Borneo

In October of 2012 I went back to Borneo after a 21 year absence. I spent time working with orphaned baby orangutans and also went back to Camp Leakey. Lots of baby photos (and videos) in this section!
Svalbard Polar Bears

An Arctic trip to see the polar bears and other marine mammals in Svalbard, Norway is one of the best wildlife trips on the planet. Click on the cute and cuddly guy above for lots more info on this trip.
This old male decided to play on the ice in front of us
Rwanda and Serengeti

The Rwanda/Serengeti trip was my 6th to Africa, and my first with gorillas. Click on the Silverback picture above to learn about this trip, and also my Serengeti trip with the big cats and my time with the Hadzabe.
Galapagos Islands

The Galapagos trip was in March of 2010. It’s a must see for anyone interested in the history of Charles Darwin and unique wildlife found no place else. Click on the tortoise picture to learn more.
Tanzania

In July of 2009 twenty of us (two groups of ten on sequential trips) went to Tanzania. It’s the same trip I took 23 years ago, and it was wonderful to live it again.
Antarctica

Our Feb 2008 Antarctica page is up and running. Click on the penguin photo above to learn about this trip, and also see a leopard seal in acton.
Kenya 

Here are pictures from our Masai Mara trip in October of 2007. View a detailed page on this trip by clicking on this funny looking guy above.
Bears of Katmai

This trip was in August of 2005. This coastal brown bear weighed over 1200 pounds according to our guide. We decided it was best not to bother him while he was dining on his salmon.
Lions of Tsavo

This was a research trip in Tsavo National Park in Kenya, spending most of our time learning about nocturnal Africa
Orangutans of Borneo (1991)

This unbelievably interesting trip was in 1991. This orang had no problems showing us how she felt about our presence!
Black Rhino of Zimbabwe

This slide show gives you a good idea of the poaching problem and why it is impossible to stop
Yellowstone National Park

Click on the coyote picture above to learn about our trip in December of 2010 to see the wolves
Practice, practice, practice
If you want to get better at your photography you need to practice with your equipment and become very familiar with it. You might also want to join us on one of our trips and go on one of our wildlife and nature workshops (oops, I meant to say funshops). People commonly ask me if they should purchase the latest Canon, Sony a1, or Nikon DSLR or one of the new new mirrorless cameras. The most important thing is not this equipment, it is to practice with the equipment you already have so its use becomes second nature. You need to be quick on the draw to get those wildlife photos, and that only comes with familiarity with your equipment.Patience
After you have practiced to the point that you are familiar with your equipment, and keep on practicing to keep your skills current, it’s time to go out in the field and be P-A-T-I-E-N-T. Wildlife needs to be habituated to you in order to see their natural behavior and to get close enough to get high quality photos, even when using powerful telephoto lenses. Habituation takes time, time spent in nature, being observant and quiet.
That patience paid off for Dr. P when he waited for these kit foxes to poke their heads out of their den. You can hear him talking to them in a soothing voice as he coaxed them out after they were habituated to his presence over a period of time.
Birds in Flight (BIF)
I shoot frequently to keep my skills up, and nothing keeps your skills up better than to shoot fast moving birds (called birds in flight- BIF). Getting them in focus and properly exposed is a fun challenge. Let’s look at a few birds in flight (BIF) pictures taken at the Bolsa Chica wetlands in Huntington Beach, CA.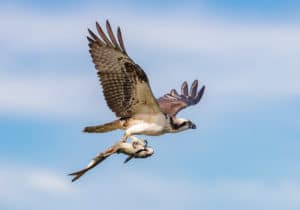
Osprey (click on the picture to learn more about these beautiful birds)
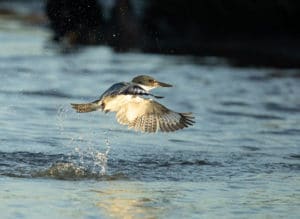
Belted Kingfisher (click on his picture to learn more)

Kestrel

Snowy Egret

Black Skimmer
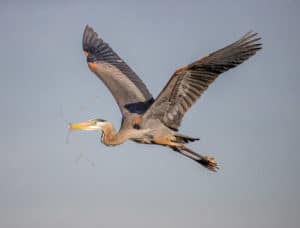
Great Blue Heron with nesting material

Northern Harrier

Diving Pelican

Diving Pelicans
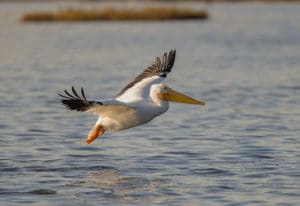
White Pelican
If you have a friend that is a falconer you can practice on these fast and erratically flying birds like these Harris Hawks. Click on the photos to see a larger version.


Northern Michigan
These shots are from northern Michigan in a town called Harbor Springs. It is oh so quaint (think of a Norman Rockwell painting), and an outdoors and wildlife mecca

Fall colors and snow

Downtown Harbor Springs

Horse farm around town

Kestrel with breakfast

Bald eagle with lake trout
 Beaver with breakfast
Shores of Little Traverse Bay

Larks lake

Nubs Nob ski area

Fall colors from the top of Nubs Nob

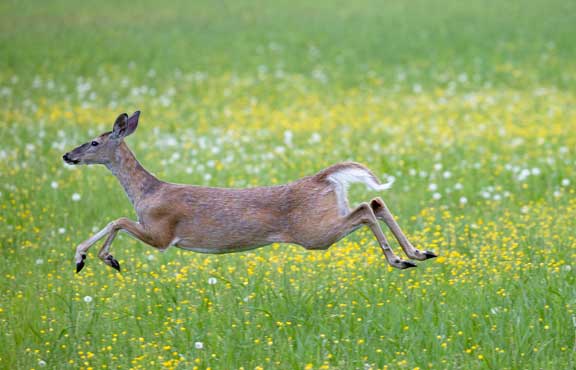
Deer at the Maple river

Female Elk at Pigeon river

Sandhill crane at Wycamp lake

Great blue heron flying at Larks Lake
Don’t forget to look down after you look up

My neighbor Skipper the chipmunk

Kaz posing during fall colors

Larks lake in the fall

Kit fox at Nubs Nob
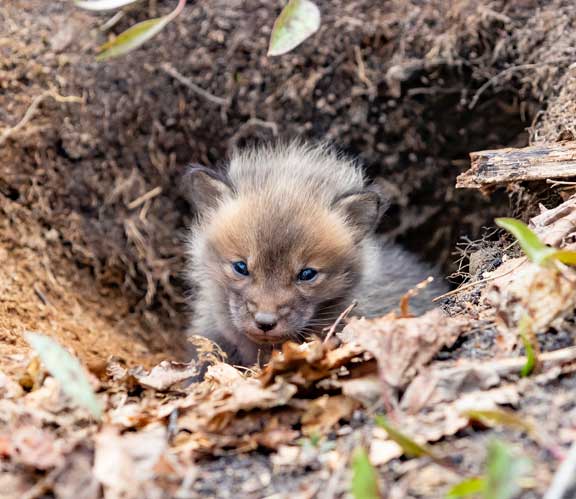
A kit fox peeking out of its den at Dr. P who was whistling softly to it

Its parent kept an eye on Dr. P while it was getting enough food to feed 3 hungry stomachs

Click the Osprey picture to see lots more wildlife and scenery of northern Michigan
I have been invited to assist Peter Read Miller and his fellow Sports Illustrated photographers at past Rose Bowl games. He is a Canon Explorers of Light member, along with other famous wildlife photographers like Art Wolfe, Frans Lanting, and Paul Nicklen. He went to Kenya with me, and of course he brought back some awesome photos.
One of his more unique shots from the Masai Mara. It is a Tawny eagle chasing a Nubian vulture away from its nest.

Here I am at the 2010 Rose Bowl hours before the fans show up. This is some of the equipment Peter uses during a game.

Things get a bit more crowded in the end zone when the game starts

USC’s John David Booty in a classic quarterback pose

USC versus U of M (the University of Michigan)

Vince Foster scoring the winning touchdown at the 2006 BCS Championship Game at the Rose Bowl

Reggie Bush running for a score at the 2006 BCS Championship Game at the Rose Bowl
Photography Equipment
I order all of my camera equipment and accessories from Allen’s Camera. They have the best service, and do not push you into purchasing something that is not right for you. Many professional photographers purchase from them instead of the larger places like Adorama and B & H because the price is just as good but the service is better and more personal. Click on the logo below to learn more. Ask for the Brandon, the owner, when you call or email.Cameras
My favorite cameras are the mirrorless Canon R5 and R3, along with the 1Dx Mark III. The new mirrorless cameras have the ability to autofocus on fast moving wildlife, which is my primary interest. In addition, their frame rates of 20 and 30 pictures per second respectively, allow you to get that right “pose”. Do keep in mind that at this frame rate you will be looking at lot’s of photos later on in Lightroom! The true test of a wildlife camera is in its ability to capture a rapidly and erratically flying bird in flight (BIF). The follow two photos show off what these cameras can do.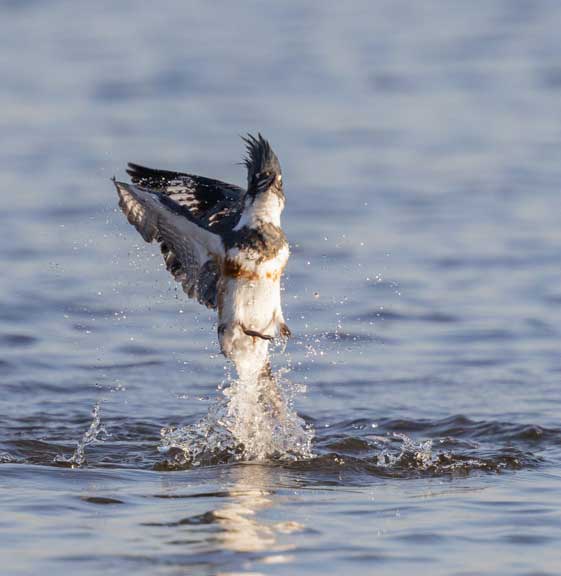
A female belted kingfisher at Bolsa Chica wetlands blasting out of the water after an unsuccessful dive for a fish

Looks like success this time
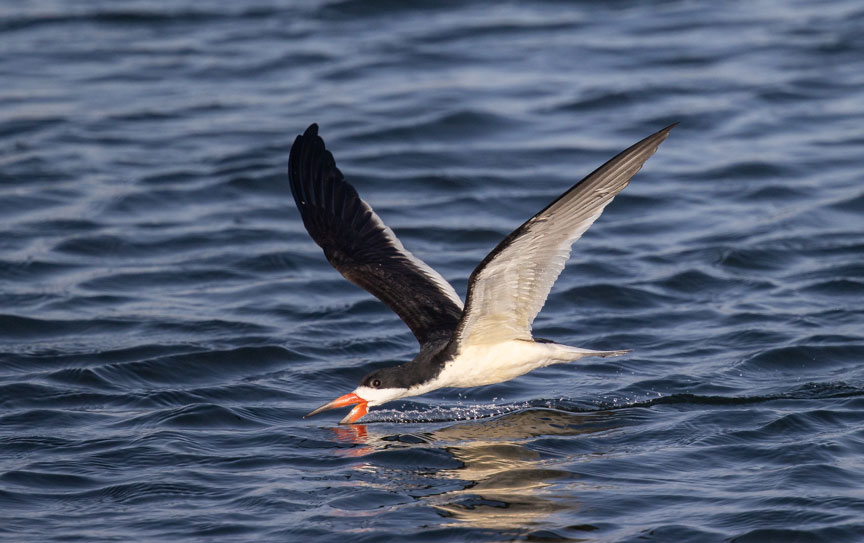
Getting one of these Black Skimmer speedsters in focus, as it darts and weaves at high speed, and has its beak in the water, is a challenge only the best of cameras can take on

This Caspian Tern is another speedster. It takes a camera with lightning autofocus to be able to capture one blasting out of the water with a fish in its beak.
At up to 20 frames (pictures) per second, you can capture that one special moment on fast-moving wildlife
Black Skimmer (click on the skimmer below to see more Bolsa Chica birds in action)

They don’t get much faster or more erratic than a black skimmer returning from feeding as it streaks past your vantage point on a windy day at Bolsa Chica. It is the autofocus that has this bird in tack sharp focus, and the frame rate that froze this bird in a nice pose.
Peregrine Falcon (click on picture below to learn much more about them)
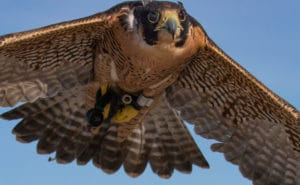
Actually they do get faster than a black skimmer, and its called a Peregrine falcon. They can fly up to 240 mph on a dive, so they are the fastest animal on the planet.
Coastal Brown Bear (click on this dining bear to learn much more)

My friend Les took this bear shot with the 1Dx and 500mm
This camera takes wonderful slow motion video. This Magellanic penguin was taken in the Falkland Islands. The link to this trip is earlier in this page.
Lenses- Here are my primary wildlife lenses
The most important part of your purchase in a digital SLR camera setup is the lens. You should budget for a high quality lens before the camera body. All too often a nice camera is used with a mediocre lens, negating the potential of the camera. Canon makes a series of nice consumer grade lenses. The 75-300, 100-300, 28-135, 55-250, and the 18-55 all give you a nice picture. If you want to get the most out of your expensive camera you need to upgrade to Canon’s L series of lenses. This is their professional lens series, and will give you pictures of better quality. You will notice the following lenses all have a red ring around the front of the lens. This denotes Canon’s professional series lenses, and are also called “L series” lenses in the Canon world. When it comes to lenses, the axiom “you get what you pay for”, certainly applies. If there is a green ring around the lens it is one of Canon’s DO (Diffractive Optics) lenses. This makes them lighter. I have the EF 400mm f/4 DO IS II lens. It is awesome, and I use it when weight is a factor. It works especially well with my Canon 7D Mark II, because I get the equivalent of 640 mm due to the 1.6X FOV crop factor with the 7D Mark II. Lenses can be a fixed focal length or a zoom.The fixed focal length lenses (also called prime lenses) sometimes produce a higher quality photo. An example of a popular prime lens is 300 mm. This is equivalent to 6x binoculars. It is not a zoom, it is fixed at 300mm, and you have to personally move farther or closer to your subject if you need to change the composition. Sometimes this is easily remedied by changing the fixed focal length lens rapidly to one of more or less magnification. This assumes you have the money to purchase several lenses, the inclination to carry them around, and the time to change them on your camera. In a dusty environment like Africa, removing the lens from the camera when you are changing it can cause problems for the camera by letting dust inside. I must admit to missing many a good picture while changing one of these lenses because the wildlife action does not stop while you are changing lenses. The zoom lenses are more flexible, and you won’t miss as many photos because now you can zoom in and out and not have to personally move to change the composition. Since most of us are not shooting for professional publications and don’t need that extra minor difference in quality, the quality of the zoom lenses will more than suffice and will yield amazing photos.Canon EF 400mm f/4 DO IS II
I now use the Canon EF 400mm f/4 DO IS II lens. Its light weight at 400mm, and its quality, make it my lens of choice when I am need to be mobile and flexible. Examples might be when I am in a kayak, or when I am hiking for long distances. I routinely use it with a 1.4X TC or a 2X TC. This gives me up to and 800mm f.8 . It is the only telephoto lens I used on my Botswana and Namibia trips in 2017.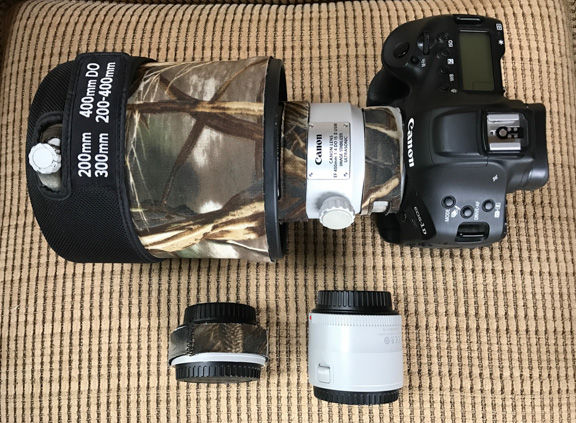
This is a potent wildlife camera/lens combination for a wide variety of uses
The smaller size of this setup allows for easier travel, and since it is relatively light and flexible, also allows you to forego a tripod, especially when photographing birds in flight (BIF), one the most difficult wildlife to photograph. I also use it when I am in a kayak.
I was in a kayak when I took this photo of a bald eagle flying overhead with a lake trout. The size and weight of this lens let me move around in the kayak to get this photo

This Pileated woodie was taken with the 400mm DO

This tern was taken with the 400mm DO and 2X TC in a kayak. It’s hard to find a more erratically flying bird.
Canon 600 mm f/4 IS II
Version III of the 600mm is my current wildlife lens of choice, oftentimes used with the 1.4X teleconverter. I use the 600mm it for all my wildlife work when I am was not hiking or in a kayak, in which case I used the 400 mm DO described above. I also purchased it so all of the attendees of the Yellowstone and Africa trips and workshops can get a chance to use such a superb wildlife lens. If you are going to Africa and want to come back with outstanding photos this is a great lens. I sometimes use it with a Gitzo carbon fiber tripod and a Wimberely or sidekick head. This tripod is light, very strong, and can easily hold the weight of this lens. The Wimbereley head makes the lens “float” on the tripod, and is a joy to use. When I travel with it I bring a lightweight Gitzo tripod and use an Arca Swiss ballhead and the Wimberely Sidekick.
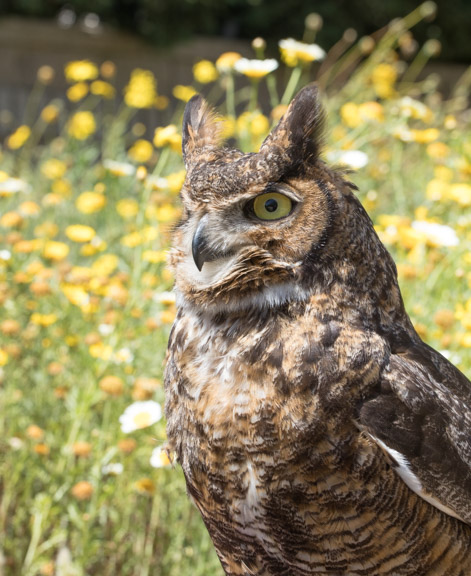
My assistant photographer is using this setup to photograph owls in Harbor Springs, Michigan as she is training to go to Botswana with me

An industrious beaver shot with the 600mm and 1.4X TC

An eagle at well over 150 yards away with the 600mm and a 2X TC
I brought the 600 on all my Africa trips for everyone to use. It has Image Stabilization (IS) so you can hand hold it on occasion, although a tripod or steady support are recommended. We will almost always be using it from the Land Rover without a tripod since we can easily steady it (as long as the other people in the vehicle are not moving around) with a bean bag. You can see this if you link to the 2007 Masai Mara page.
Striped Kingfisher taken with the 500
Canon 300 mm f/2.8 IS II
Optically speaking professional photographers feel this is the finest lens in the Canon arsenal. It is highly prized for outdoor sports photography because it focuses rapidly, the large aperture can blur the background and the pictures it produces are outstanding. Version II of this lens is possible the best lens Canon manufacturers. Lenses like this one, and the following one, take practice to learn how to use them properly. They are larger than the lenses most people are used to, and need steady support like a tripod or monopod in many cases, although you can hand hold the 300 mm easily for short periods of time. Keep in mind that 300 mm is oftentimes not enough power for wildlife, and this lens is commonly used with the 1.4X teleconverter to make up for this deficiency. I used this lens on the Antarctica trip to take the picture of the whale tails. I also used this lens to take the hummingbird picture above.
Reddish Egret taken with this lens and a 1.4X TC at Bolsa Chica in California
Canon 70-200mm f/4 or f/8 Image Stabilized (IS)
This lightweight and relatively inexpensive zoom lens will cover a wide range of photographic needs. It is recommended for general travel photography and takes great photos. If you can only purchase one lens for all your photographic needs this is the one if weight is important, and you are not shooting wildlife at a distance. The lens can keep an aperture of f/4 all the way from 70 mm to its maximum of 200 mm. This differentiates it from a consumer grade lens, and is consistent across the Canon line of “L” series zoom lenses. It does not have enough focal length for wildlife photography in general, it is a compromise for someone needing a lens for general purpose photography, and wildlife lens that is light and inexpensive. The f/2.8 version of this lens is even better, as long as you are OK with the added weight and cost. This is the one I bring on my trips.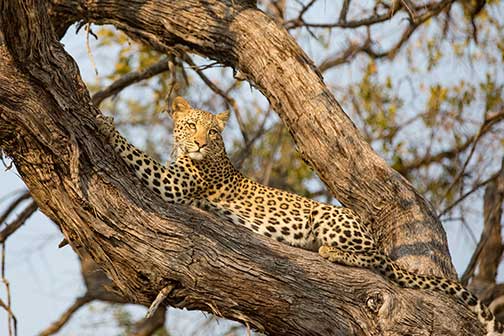
I used this lens with a 1.4X teleconverter to get this leopard shot in Botswana
Canon 24-105mm f/4 Image Stabilized (IS)
This relatively lightweight wide angle zoom has great image quality when you need to get a wide field of view. I used it often on my Tsavo trip, Antarctica trip and in Galapagos. Whenever I am shooting I always leave the house with this lens, no matter which camera I have or my subject matter. It is awesome on the 5D Mark IV and 5D Mark III, 1Dx, and 1Dx Mark II, yet it can zoom to 105 mm.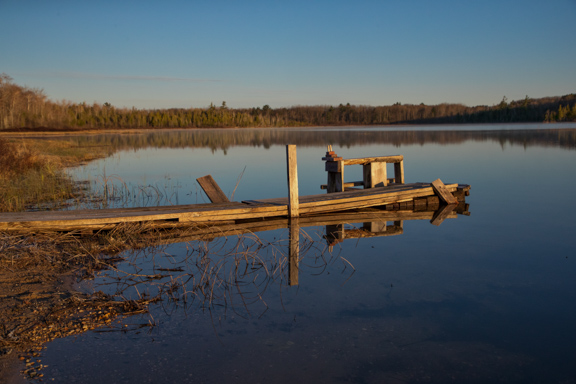
This lens was used to take this photo of the lake where the above eagles had their nest
Canon 135mm f/2.0
This very high quality prime lens is used when you want pictures of tremendous sharpness. I use it for many of my portrait shots. It excels in low light situations because of its f/2.0 aperture. When you are using flash at night the big aperture gives it more power to illuminate further in the distance. If you are photographing wildlife with a cluttered background this large aperture lens allows you to blur the background and eliminate the distracting clutter. The photo at the top of this page with the lion over the cape buffalo was taken with this lens. It was a night shot, and since we didn’t dare get too close to this lion and his kill, I had to shoot from a distance that was at the maximum range of my flash. Having the larger aperture (f/2.0) of this lens gave me enough flash power to get the photo properly exposed. Many of the gorilla shots were with this lens because we were in the darkness of the jungle and were not allowed to use flash. This lens saved the day on this trip because flash is not allowed. It is also great at concerts, museums, churches and plays when flash is also not allowed.
Many of the gorilla photos, like this female with two-day-0ld twins, that was hiding from us in the dark forest, were taken with this lens
Canon 100 mm f/2.8 macro
For closeup (called macro) photography you need a specialized lens. I use the Canon 100 mm f/2.8. You will need to practice with this lens because focusing can be difficult due to the limited depth of field. A tripod is highly recommended. I use it for all the medical work at Long Beach Animal Hospital. Click on the Disease Section at the top of this page to see these photos, along with the Facebook link at the top right of this page.
Here is my 5D Mark IV with a macro lens attached to a ring flash
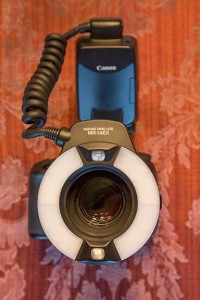
Flash is important in macro photography. One of the best ones regarding portability, ease of use, and cost, is a ring flash.

A bee on a flower

I use the macro lens for most of my photography at the Long Beach Animal Hospital, especially surgery pictures.

This lens is also a wonderful portrait lens
We even take animal portraits with this lens!
Flash
This is a good time to touch on flash photography. If you are interested in wildlife or sports photography you need a good external flash. I keep mine available at all times when I am shooting, even in daylight. I use professional external flashes (also called strobes) on all my workshops and will teach everyone how to use it in daylight and evening. When you want additional reach, and are using a lens of 300mm or longer, the Better Beamer will help extend your reach.
The primary flash is use is the 600 EX. It has significant power to reach those elusive animals that hide in trees and bushes

One of those elusive night creatures you can surprise with a flash like this and a good lens. Do you know what this creature is?