
Fluid therapy might just be the most important medical therapy we perform on sick animals. Dehydrated pets feel ill, cannot fight disease, do not eat well, and cannot metabolize drugs efficiently. Dehydration decreases the circulation to two very important organs, the liver and the kidney. These organs are then unable to perform vital functions, some of which include detoxifying drugs and removing waste products.
We utilize the guidelines of the American Animal Hospital Association (AAHA) and the American Association of Feline Practitioners (AAFP) when giving fluids to sick animals.
Fluids are crucial to anesthesia. This pet, about to have a C-section, is going into surgery with her fluid bag and IV pump (and Briana her nurse) along with her.
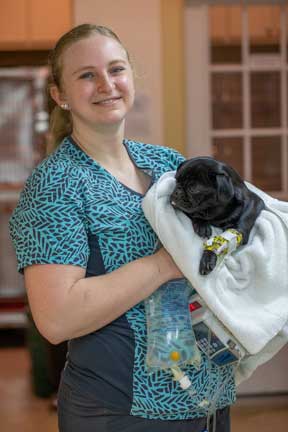
These fluids will stay with this dog until ready to go home
Fluids are life-saving in an emergency when a pet is in shock, bleeding, or in great pain. If your pet needs emergency fluids The Long Beach Animal Hospital, staffed with emergency vets, is available until the evenings 7 days per week to help if your pet is having any problems, especially shock, seizures, pain, difficulty breathing, or bleeding.
Think of us as your Long Beach Animal Emergency Center to help when you need us for everything from minor problems to major a major emergency. We serve all of Los Angeles and Orange county with our Animal Emergency Center Long Beach, and are easily accessible to most everyone in southern California via Pacific Coast Hwy or the 405 freeway.
If you have an emergency that can be taken care of by us at the Animal Emergency Hospital Long Beach always call us first (562-434-9966) before coming. This way our veterinarians can advise you on what to do at home and so that our staff and doctor can prepare for your arrival. To learn more please read our Emergency Services page.
We give fluids to a wide variety of species in addition to dogs and cats. They can be ill, and need fluids for many different reasons.

This guinea pig being examined by one of our externs has a problem with overgrown teeth and cannot eat well. This has caused him to become dehydrated, and in need of supplemental fluids.

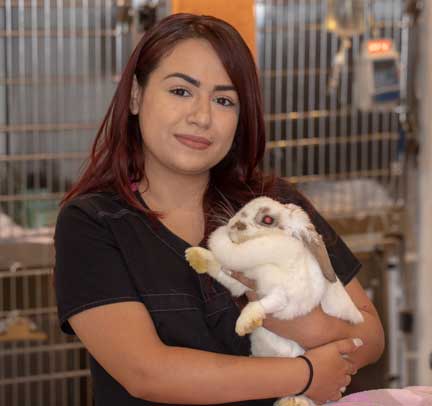
Before coming in for treatment this rabbit was painful from a broken leg and not eating well, so it became dehydrated. Supplemental fluids to correct the dehydration, and a splint to take away the bone pain and allow the healing, were needed to get him back to being a normal bunny again. You can see how we treated his fracture here.

Yup, we even give fluids to 120# pythons when they are ill or dehydrated. This is probably not something you want to try at home!
Fun Facts
Before we get started on the specifics, let’s go over a little background on fluids.
The body weight of a normal dog or cat is about 60% water, puppies and kittens are up to 80% water. These numbers show the importance of a proper fluid balance for normal physiology, especially in puppies and kittens when these animals become dehydrated.
The fluid in the bodies of normal animals resides in 3 areas:
- Inside the cells of an individual organ, called the intracellular space. 65% of the total fluid in the body resides in this intracellular space.
- In the bloodstream, called the intravascular space. 25% of the total fluid in the body resides in bloodstream.
- In the tissue surround the cells, called the interstitial space. 10% of the total fluid in the body resides in the interstitial space.
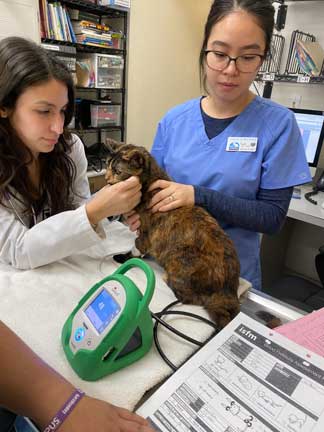
When the intravascular fluid is low hypovolemia results. Hypovolemia means the body cannot deliver adequate oxygen to the cells, and a pet can go into shock. If not treated death can ensue. We assess this low oxygen problem with an instrument called a Pulse Oximeter, which measures the oxygen saturation of the hemoglobin molecule in the red blood cells. It should be in the 90 percent range.
This pot-bellied pig, with a 92 % oxygen saturation, and a heart rate of 82 beats per minute, is normal
Pets with hypovolemia are very ill and can exhibit some of the follow symptoms:
- Elevated heart rate, called tachycardia.
- Slow heart rate, called bradycardia. This occurs when your pet is in the act of dying.
- Weak peripheral pulses. We detect this on an exam by palpating the femoral pulses while simultaneously listening to the heart.
- Prolonged capillary refill time (CRT). For a normal animal this should be under 2 seconds.
This is how we check the CRT. This pet is under anesthesia, a time when we carefully monitor this parameter
- Cold extremities
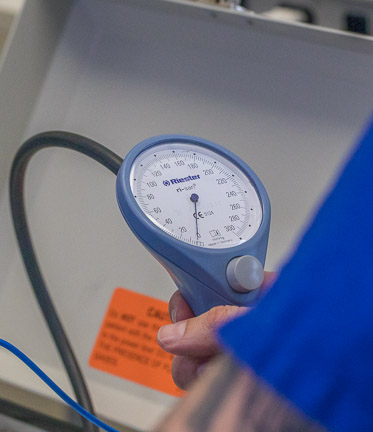
- Low blood pressure (hypotension)
We have special blood pressure machines calibrated for animals
- Hypothermia (low body temperature)
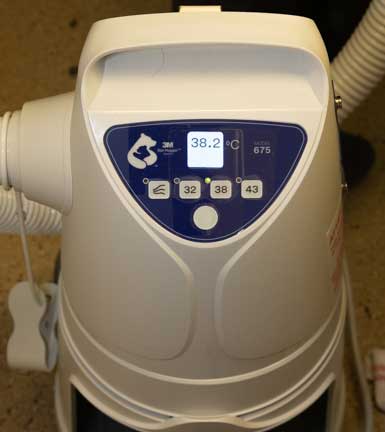
We are always on the alert for hypothermia, and use a special hot air blanket machine to warm animals up if needed
When the interstitial fluid is low dehydration results. This is not usually life threatening until the dehydration progresses to around 10%, which now causes hypovolemia. Dehydration is detected during an exam when any of the following occurs:
- Tacky or dry mucous membranes (the gums)
- Skin tenting
- Sunken eyes
- Elevated BUN or Creatinine on a blood panel
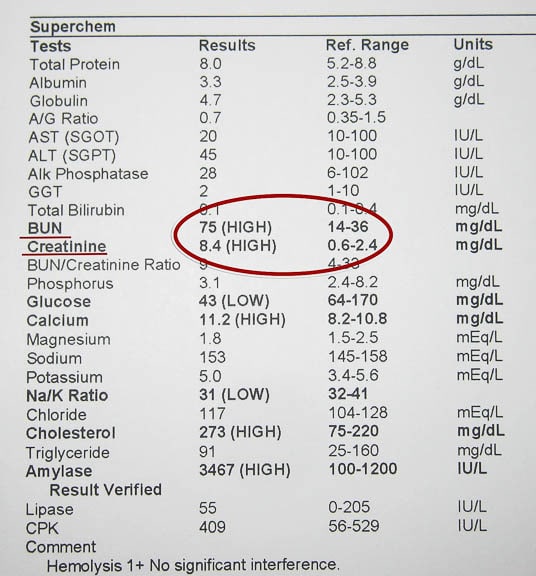
An elevated BUN and creatinine is called azotemia
- Elevated hematocrit and total protein
A blood sample will also give clues to dehydration, especially the total protein level and the hematocrit. In conjunction with the history, exam findings, and hematocrit level, the protein level helps us determine the degree of dehydration. It only takes a small amount of blood to fill a microhematocrit tube to run this test. This makes it useful in small animals, and especially birds that do not have much blood in them.

This is the hematocrit test, checking the percentage of red blood cells in the serum, giving us information on the state of your pet’s hydration
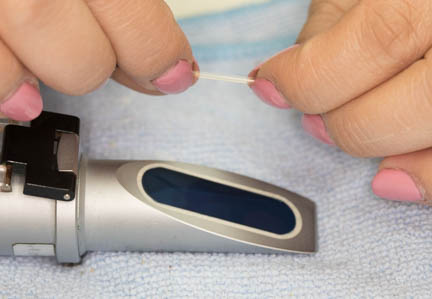
After the hematocrit is measured we break the tube in the middle and place the serum on an instrument called a refractometer to check the protein level.
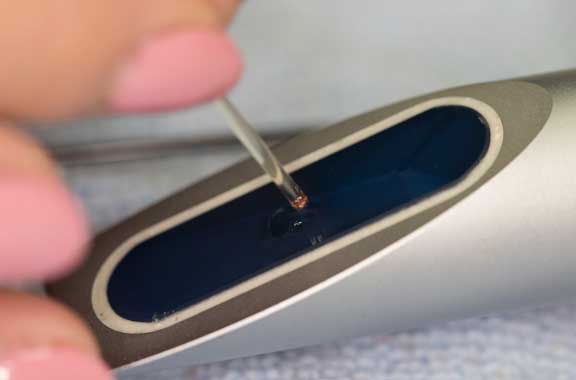
It only takes few drops of serum for a proper reading
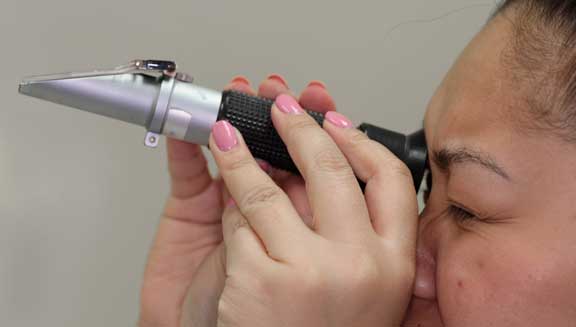
Inside the refractometer is a gauge that measures the level of protein
Hypovolemia and dehydration can occur independently. A dehydrated patient might not be hypovolemic, and a hypovolemic patient might not be dehydrated.
Our doctors decide on how much fluid to give your ill pet based on the following:
The normal (called maintenance) amount of fluid your pet needs every 24 hours to maintain normal physiology (called homeostasis).
For a dog this is 60 ml for each kg of body weight. For a 20 pound dog this is 545 ml (1/2 of a liter, or 30 ounces) per 24 hours.
For a cat this is 45 ml for each kg of body weight. For a 10 pound cat this is 204 ml (0.2 liters or 7 ounces) per 24 hours.
The degree of dehydration of your pet
A 20 pound pet that is 7% dehydrated needs 600ml to correct this dehydration. This is more than pet owners realize, and why proper fluid therapy is so important when we hospitalize your pet.
Ongoing fluid losses like vomiting or diarrhea. As pet that has been burned has tremendous fluid losses due to seepage of serum at the burned skin area. This ongoing loss is subjective, but it needs to be added to the calculation above if your pet continues to have these fluid losses.
Symptoms of Dehydration
Signs of dehydration include lethargy, anorexia (poor appetite), sunken eyes, sticky gums, constipation, and a general feeling of malaise. It is diagnosed based on a history of anorexia, vomiting, diarrhea, or extra fluid loss, in combination with a physical exam and diagnostic tests.
During an exam a dehydrated pet will shows signs of dehydration when the problem is greater than 5 %. The page talks about the two primary methods used to give fluids to pets. The first is intravenous, and is performed only by us in the hospital. This is not a treatment method you will do at home.
The second method is subcutaneous (under the skin) that you can do at home after our instruction. This is sometimes abbreviated as SQ.
Types of Fluids
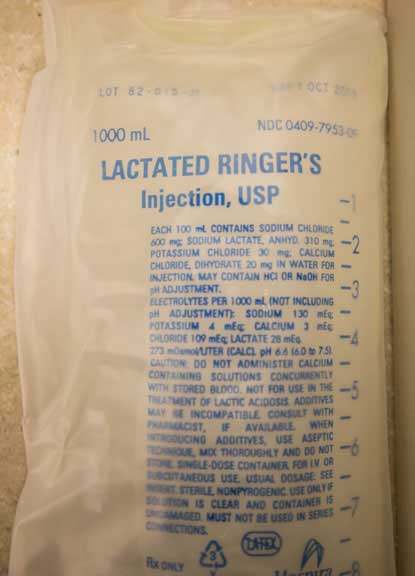
The type of fluids we will be describing are called crystalloids. This are the kinds most people are used to, and are usually lactated ringers solution (LRS) or sodium chloride (NaCL), and variations thereof that we might use in specific situations.
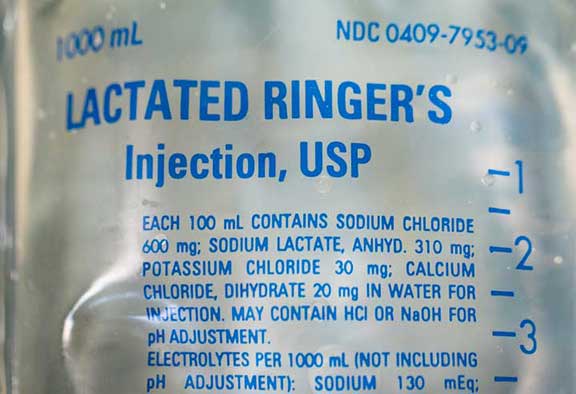
These are some of the ingredients in LRS
Another type of fluid is called a colloid (hetastarch or hydroxyethyl starch). Colloids are used only in specific situations, which are not common. For the remainder of this page we will be referring to crystalloids.
Intravenous (IV) Fluids
I.V. (intravenous) catheters are used extensively in pets that are sick or those pets that are about to be anesthetized. These catheters allow us to administer medication directly into the venous system for rapid distribution to the whole body.
Medication given this way acts faster and is more controllable, a significant advantage for an ill pet or in an emergency. IV administration of fluids is critical in pets that are hypovolemic.
Intravenous fluids are important during surgery. We monitor this closely in many ways, especially with the blood pressure.
If your pet is ill and staying in the hospital, or about to undergo anesthesia for any reason, an I.V. catheter to allow fluid administration is one of the most important therapies we can institute, and can literally be life saving.
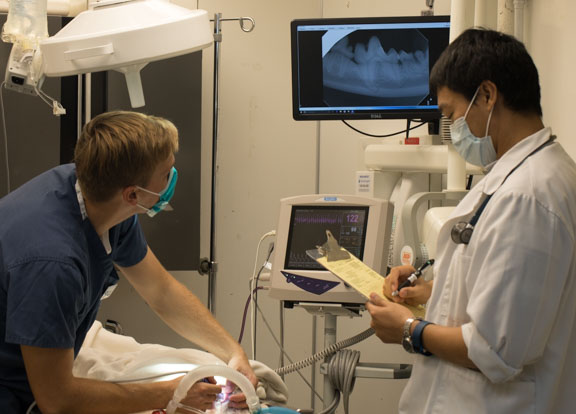
This dog getting his teeth cleaned was put on IV fluids before the procedure to stabilize the kidneys for the anesthesia. The fluids are continued for the duration of the procedure, and will be administered until this pet is fully awake and its owner is picking it up.
The placement of the catheter requires technical skill and knowledge, particularly in small or dehydrated pets (the veins in these pets are small and damage easily). Improper placement of the catheter can literally cause more harm than good. Our nurses excel at placing I.V. catheters in all species.

Because the catheter is introduced directly into the venous system, it must be placed in an aseptic (sterile) manner. The hair over the vein is shaved, and special tape is placed over the catheter.
Comfort is also important when placing the catheter due to the small nature of some of our patients and the duration the catheter must stay in the vein. This tape and catheter is constantly monitored by our staff for comfort and sterility. After 3-5 days we usually replace the catheter in order to minimize the chance of the catheter causing an infection.
I.V. catheters are usually placed in one of three veins:
Cephalic Vein-This is by far the most common vein to use. It runs along the top of the foreleg of dogs and cats.
Jugular vein-This vein is in the neck. A catheter placed in this vein allows longer term use and the ability to give larger volumes of medication with different viscosity’s.
Saphenous-This vein is on one of the back legs. It is mostly used when the cephalic vein is unusable, but can be used at any time. Depending on the species, this vein might be too small or fragile to take the fluids.
Various other veins are sometimes used, by they are reserved for some of the more unusual species of animals we deal with. In some of these pets like birds, that have minuscule seized veins, we cannot give the necessary emergency fluids intravenously.
In these cases we use what is called an intraosseous catheter. This catheter goes directly into the bone marrow, and allows us to give the necessary fluids to a small creature rapidly and effectively. In birds it is put in what is called the tibiotarsal (tibiotarsus) bone. This is equivalent to our tibia or shinbone. It is put in at the knee joint.
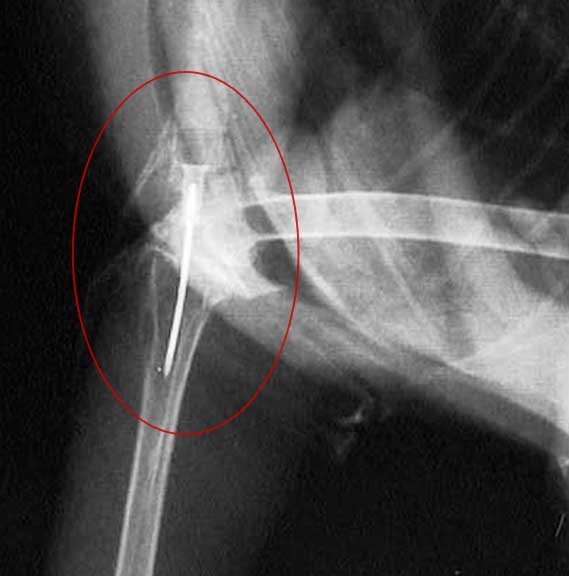
This radiograph shows the placement of an intraosseous catheter. It is going down the shaft of the tibiotarsal bone in this bird that came in collapsed and in shock. The bird responded and recovered completely after we administered fluids through this catheter.
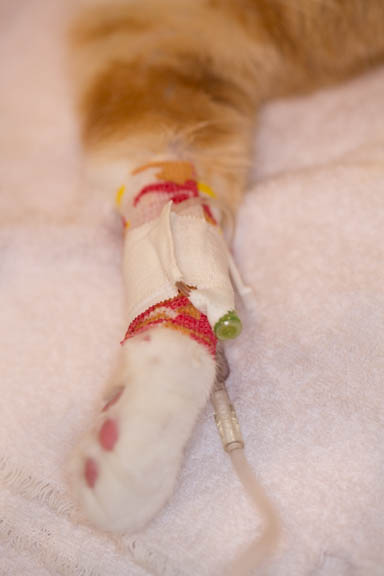
Your pet’s catheter will stay in for the duration of its hospitalization or procedure, and will not be removed until you return to pick up your pet. Your pet may go home with a small piece of tape and cotton where the catheter was. It can be removed several hours later after you return home.
This bun-bun is going home after being treated for GI stasis. The white tape on its left leg is where the cephalic IV catheter was just removed.
We use many different types of fluids, the most common one being Lactated Ringer’s Solution. The amount of fluids given are calculated and monitored carefully. We use a special fluid pump that gives a consistent amount of a period of time.
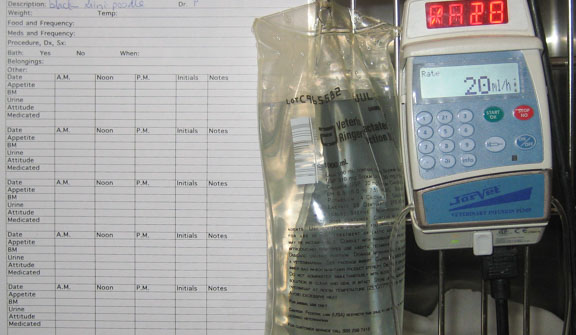
Each patient receiving fluids has a custom fluid chart outside its cage for close and constant monitoring of the fluids. Our doctors make adjustments in the type and amount of fluids as diagnostic tests like blood panels, and your pet’s response to treatment, are analyzed.
Subcutaneous (SQ) Fluids
The second method used to administer fluids is subcutaneously (under the skin) between the shoulder blades. The administered fluid slowly absorbs over several hours. In our hospital, and on an out-patient basis, this method is used for pets that are not seriously ill, but just need some additional fluids to maintain hydration, fight a fever, or stimulate the appetite.
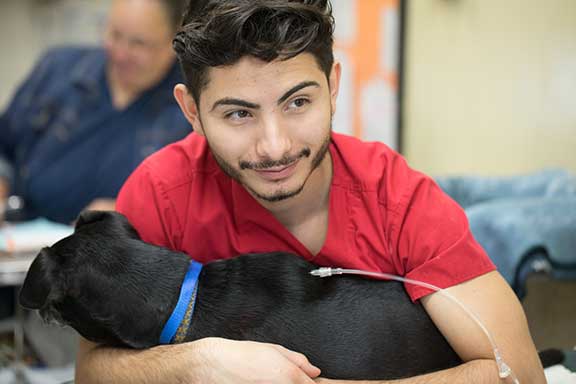
If your pet needs to be on SQ fluids on a long term basis due to a chronic disease, think of it as bonding time and make it a positive experience, like it is for Alex and this dog
This section on SQ fluids contains detailed step-by-step descriptions on how to give fluids at home when prescribed by one of our doctors for any reason. When you first read it you might think there is no way I can do all of that. Once you observe us do it in front of you, and then do it yourself, you will realize it is not anywhere as difficult as you think when you read about it the first time.
This video shows how we give SQ fluids at our hospital. Notice how calm this dog is.
SQ fluids are of special benefit for pets that need long term fluid administration at home, usually older (geriatric) cats or those with kidney disease. This is the animal version of dialysis in people, and it works extremely well. These fluids at home are highly beneficial, and we have had cats with chronic kidney disease do well for years with this treatment at home.
If your doctor feels your pet needs SQ fluids at home you will be taught how to administer them by our nursing staff. At first it might seem an impossible notion to give your pet fluids at home. Not only is there the psychological fear of using a needle, or worry about hurting your pet, there is also a worry that your pet will not stay cooperative long enough for the few minutes it takes to give the fluids.
Rest assured that you will not be forced into giving these fluids if you feel uncomfortable, although we have yet to encounter a client that was not able to perform this procedure at home. This is because we have extensive experience in this area, and we teach you at your own individual pace. Only when you feel you are ready will you proceed on your own.
You will be given as many personal demonstrations as necessary, and can return to the hospital at any time for further demonstrations or to make sure you are performing the procedure properly. You are welcome to bring your pet in at any time for assistance in giving the fluids, so do not feel you are on your own.
If you are out of town, your house sitter can bring your pet in for these fluids. We consider you part of our nursing team and are willing to give any assistance needed. Before you are given a live demonstration the following basics will help prepare you.
The scariest part of the whole procedure for most people is the actual insertion of the needle into the skin so that the fluids flow under the skin (SQ). You will watch us do this as many times as you need to overcome any fear you might have. When you realize it is not all that difficult by watching us do it, we will hold your hands when it is your turn if needed.
Practicing by inserting a needle into an orange or similar fruit can be helpful. Different sized needles, ranging from 22 gauge to 18 gauge, are used to give SQ fluids. During the demonstration we will show you which one works best for your pet.
The 18 gauge needle has the largest diameter. Fluids flow fast through this needle, taking less time to give them. If this size needle is uncomfortable for your pet, we will try the 20 gauge next because it is smaller, although the fluids will flow more slowly. On small pets we might even use the 22 gauge needle.

They are color coded for easy identification
During your demonstration you will be told exactly how much fluids to give. For most cats with chronic kidney disease this is 100ml once or twice daily. The fluid bag has 1000ml (1 liter), so for the average cat you will be able to give these fluids for ten days when give once per day. This might vary depending on many factors, and your doctor will determine the amount and frequency. Do not change this unless instructed to.
Keep children and other pets away if they are disruptive during the process of giving the SQ fluids at home. Have all of your equipment readily available, usually on or near the same table as your pet. Depending on the size of your pet, the table should be around waist to chest high. It is helpful to set up one area of your house to give the fluids. Hang the fluid bottle in this room for easy access. It should be at least a few feet above the table for optimum flow. You will be shown how to set this up by one of our staff.
Store the fluid bag at room temperature and cover the bag so no light hits it. We sometimes add medications like vitamins and electrolytes to the bag, and light can affect them.
When you purchase a fluid bag from us it needs to be set up with the IV line. We will show you how to do this in person. You only need to set it up when you purchase a new bag. After that, you give the fluids with a new needle each time, keeping the IV set attached, until the bag is empty.
Never use the needles more than once since they are sterile and very sharp when first opened. Repeated use could cause an infection in your pet, and makes the needles dull, causing discomfort on administration. Needles are inexpensive, so don’t take the chance by re-using them.
When you purchase the bag it comes wrapped in a plastic wrapping. Remove the wrapping at home when you are ready to set it up to give fluids to your pet. After you remove the outer wrapping lay the bag on your table or hang it from a coat hanger.
A 1 liter bag of LRS in its protective bag
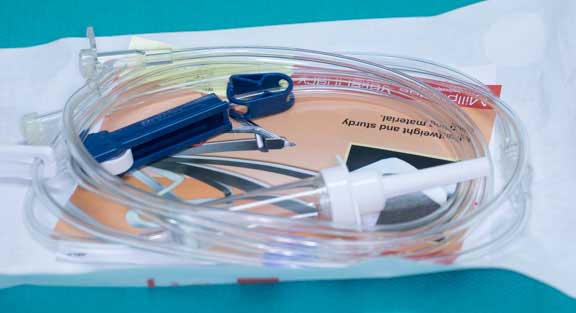
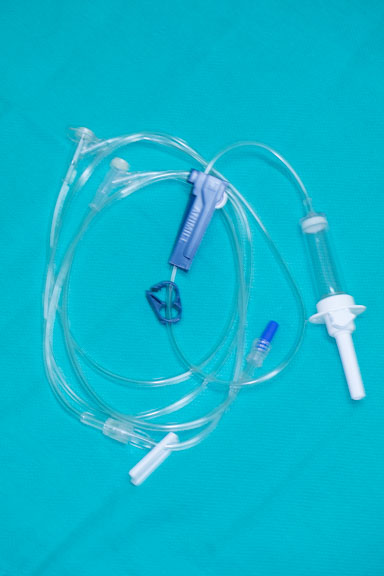
Open the sterile IV set and lay it on the table

These are the components of the IV set
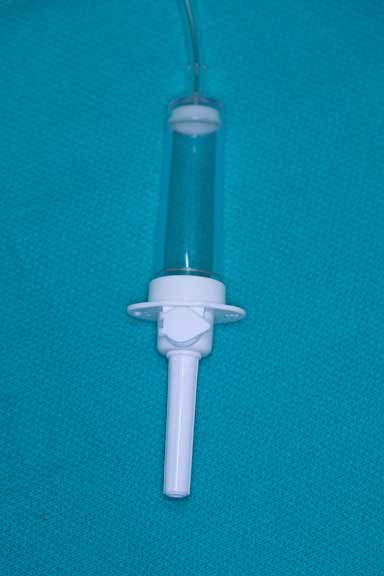
The large white end with clear receptacle goes into the fluid bag once the white cap is removed. The clear container above will be filled part way with fluid once attached.

At the opposite end of the IV line is a small blue cap. You remove this blue cap when you attach a needle, which you will learn about later.

The large blue plastic piece in the center allows you to turn the flow on and off, and also adjusts the rate of flow. Make sure the white wheel is in the off position like this when first setting it up.
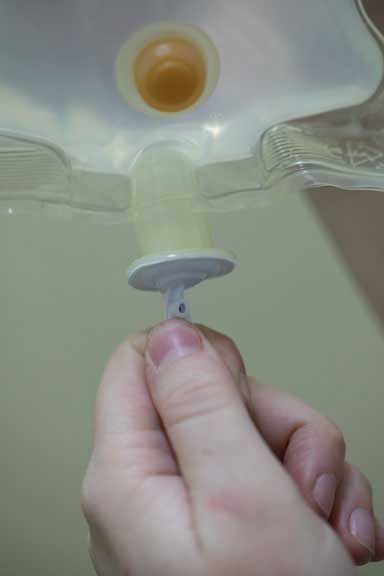
Remove the white plug from the bottom of the bag. The cap is in solidly, so you will need to pull hard to remove it.
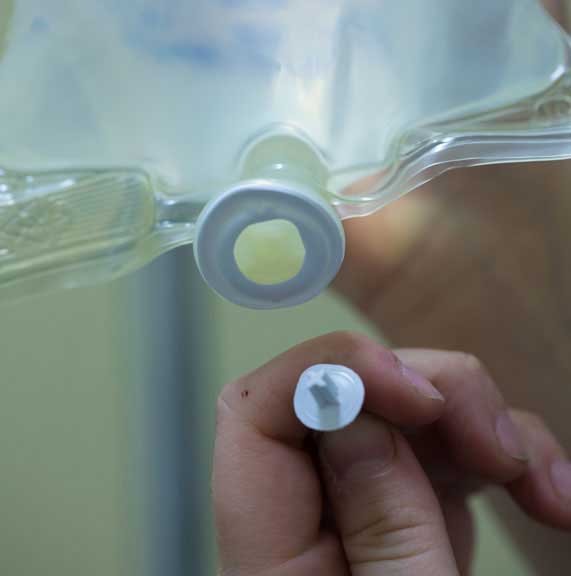
You can do this while the bag is hanging, or while it is laying on the table. Discard the white cap, it will not be used again.
Remove the white cover from the IV set receptacle. It is sterile, so do not touch it to anything at this point.
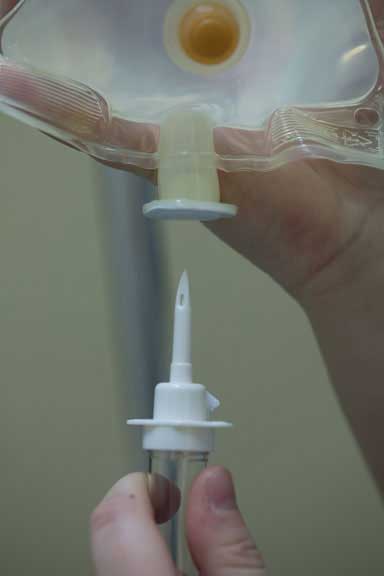
Hold the hanging bag steady, or lay it flat while doing this, so you can put it straight in without touching anything else.

Insert it all of the way into the fluid bag
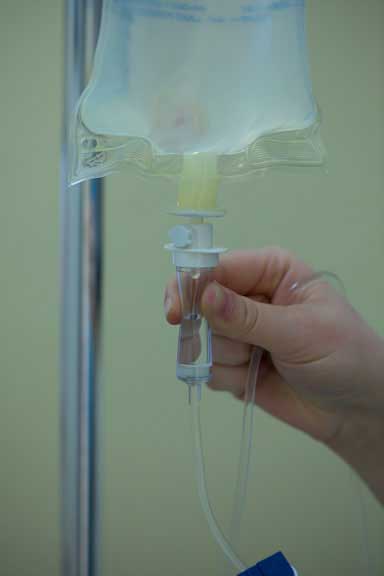
Hang the bag, then squeeze the receptacle until the fluid fills half of the receptacle

It should look like this when you are done

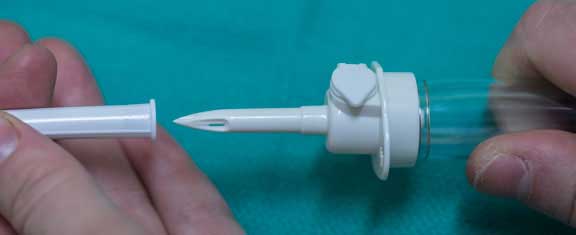
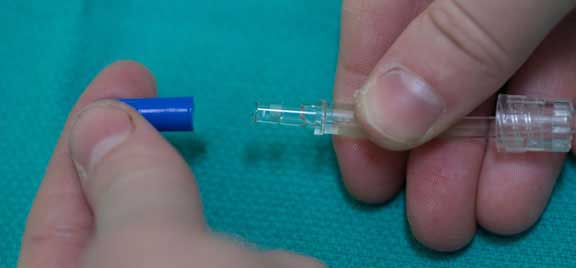
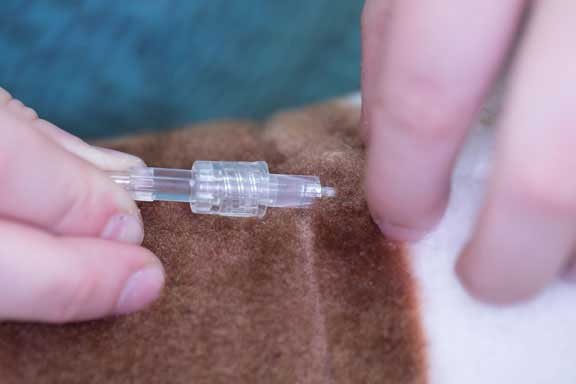
Lay the needle next to the end of the IV set that has the blue cap

Remove the clear plastic at the base of the needle by twisting it either direction. The open base of this needle is sterile, so do not touch it to anything until you insert it into the IV line.
Remove the blue cover at the end of the IV set. Turn the fluids on and let a few seconds of fluids flow through the IV line to remove the air. Let these few drops flow into a small bowel or on to a towel. Do not touch the end of this line to anything.

A few air bubbles left inside the IV line will not cause any problems

Insert the needle straight into the opening. Hold you left hand still as you twist clockwise with your right hand to lock it tight.
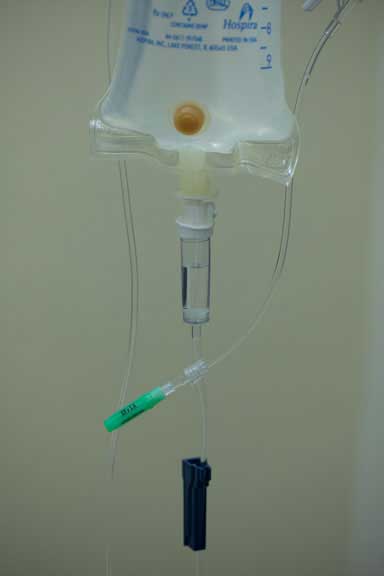
Hang the IV set over the fluid bag. You are now set to give the fluids.
Every pet reacts differently to the actual giving of the fluids, and they feed off of your emotions, so cool and calm usually works best. If either one of your gets worked up, stop and try again later.
Make sure the location to give the fluids is subdued and calm, with no excessive lighting or noise to alarm your pet. Take your time by bringing your pet to the table and interacting with it by petting it and holding it. You can even feed it while giving the fluids. A towel for restraint, or another person holding the head, might even be appropriate.

Hold your pet to the side, make a small tent of the skin between the shoulder blades, remove the cap over the needle, and rapidly insert the needle between the shoulder blades in one motion.
Insert it all of the way in until the hub touches the skin. Turn on the fluids completely on by moving the white wheel all the way to the top, and give the prescribed amount of fluids. For most pets, this takes only a few minutes of your time daily, a few minutes of your time that will be highly advantageous to your pet.
When you are finished giving the fluids remove the needle from your pet and cap it. Remove the used needle and place a new sterile needle at the end of the IV set, and hang the IV set over the bag as before. You are now ready to give the fluids again the next time one of our doctors prescribes.
Finally, pat yourself on the back for a job well done, have a seat, and breathe deeply (or get a stiff drink if needed to calm your shaking hands).
Place all used needles in a safe place with no access to children or pets. A sharps container to hold these needles is the best place to put them until disposal. Dispose them according to the guidelines in your community. Here are some local disposal centers for needles. If you are not near one of these areas call us at 562-434-9966 for other locations:
EDCO Recycling and Transfer Center
2755 California Ave.
Signal Hill, CA 90755
562-597-0608
L.A. County Sheriff- Lakewood Station
5130 N. Clarke Ave.
Lakewood, CA 90712
Huntington Beach Collection Center
17121 Nichols Lane
Huntington Beach, CA 92647